Sugar Sell 14.0 Portal User Guide
Overview
The customer support portal allows you, the portal end user, to interact with your vendor and perform actions such as creating and managing your support cases as well as searching for and accessing any product issues/ideas and knowledge base articles. You can also view and update your contact information via the portal which allows you to keep your record up-to-date in the vendor's system. Please note that the modules, options, and functionality available in the portal may vary depending on your vendor's configuration. This documentation covers the basics of utilizing the support portal as well as how to perform common tasks such as creating records (e.g., cases), adding notes to records, searching for records, etc.
Signing up for the Support Portal
In order to access the support portal, you can either register using the "Sign Up" link on the portal login page, if available, or ask the vendor to create an account for you. Ask the vendor for the portal login page URL if you do not already have it. 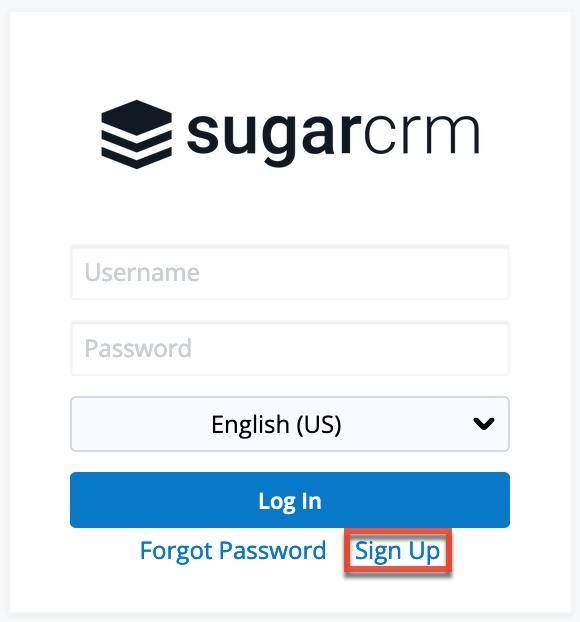
Complete the registration form, including all required fields (e.g., Email Address, Username, Password), then click "Sign Up". Please note that the password you enter must conform with the password requirements configured by your vendor. Once your portal activation request gets submitted to your vendor, a representative in the organization will need to review and approve your request before you can access the portal. Once your portal account has been activated, you will receive an email from the vendor confirming that your account is ready to access. 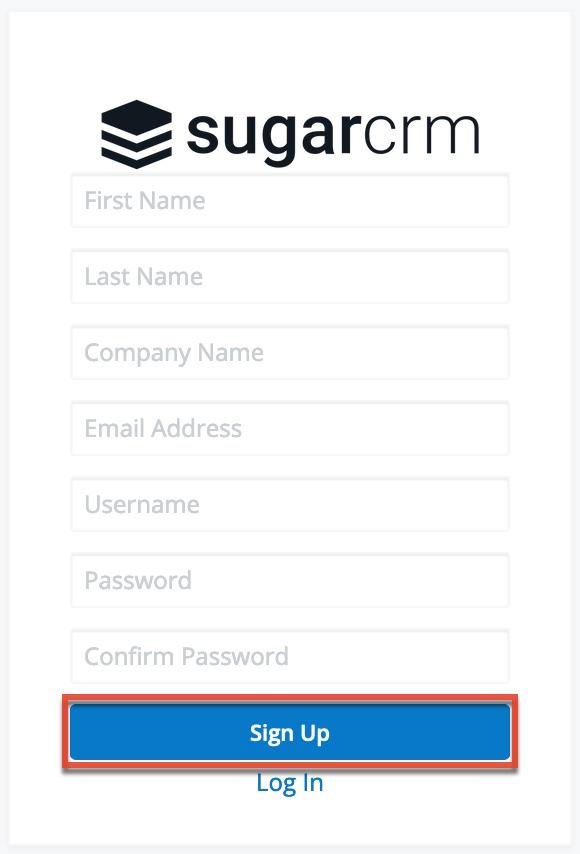
Accessing the Support Portal
Once your portal account has been activated, you can navigate to the portal's login page using the portal URL previously provided by your vendor. If you do not have an active portal account, you will need to sign up for portal access by following the instructions in the Signing up for the Support Portal section. The following sections will cover the basics on how to log into the portal, reset your password, etc.
Logging in
The portal login screen is where you will enter the username and password that you entered when registering for the portal account. Once you have entered in your login credentials, click the Log In button to access your portal account. Please note that you will need to have an active portal account before you can access the portal.
If you do not remember your username or are having difficulty logging into your account click the Forgot Password link, if displayed, then click "Forgot Username" (if the link is available) in the following screen, which will open up a Contact Info screen containing the vendor's contact information (e.g., phone, email) where you can reach out for further assistance.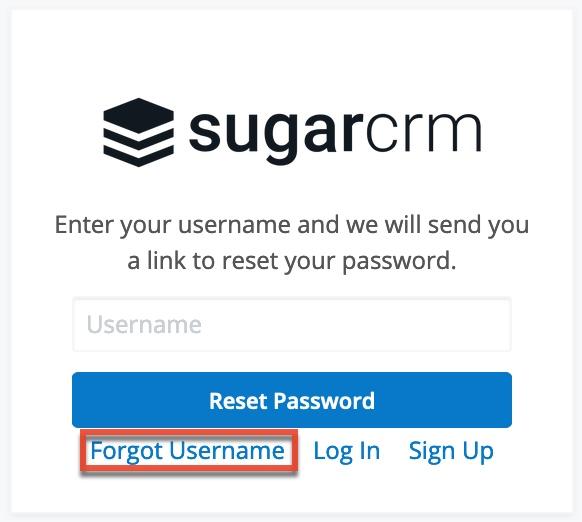
If you have forgotten your password, then you can reset it by clicking the Forgot Password link, if available, and entering your username in the next screen. For more information on resetting your password, please refer to the Resetting Your Password section below.
Resetting Your Password
There may be occasions where you forget your password for the portal and will need to reset it. You can request a password reset directly from the portal's login screen by clicking the Forgot Password link. If you do not see the Forgot Password link on the login screen, reach out to your vendor for further assistance. Once you click the Forgot Password link, the Forgot Password screen will open where you can enter your username and click "Reset Password".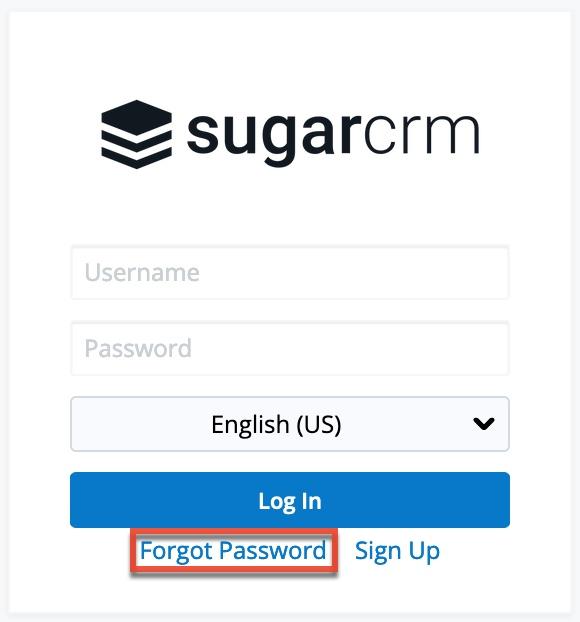
An email containing instructions to reset your password will be sent to the email address the vendor has on file for you. Simply click the link in the email which will open the reset password page where you will enter your new password and confirmed password. Please note that the new password must conform with the password requirements configured by your vendor. If you do not receive an email, you can click the "Did not get an email?" link on the email confirmation screen, which will open up a Contact Info screen containing the vendor's contact information (e.g., phone, email) where you can reach out for further assistance. Please note that you can also click the Forgot Username link on the Forgot Password page to access the same contact information. 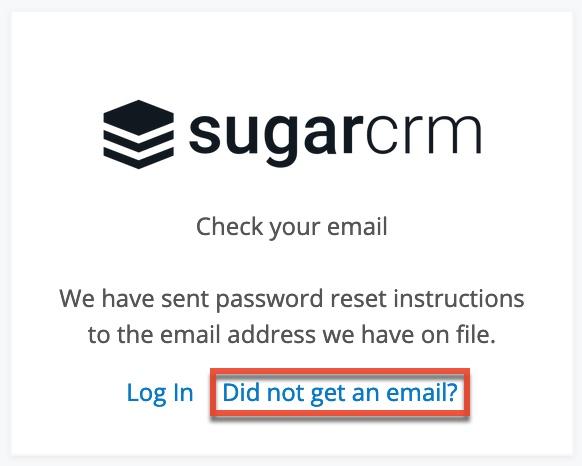
Setting Your Language
You have the option to choose the primary language you want to be displayed in your portal account by selecting the desired language from the language dropdown list on the portal login screen. Please note that the default language selected is English (US).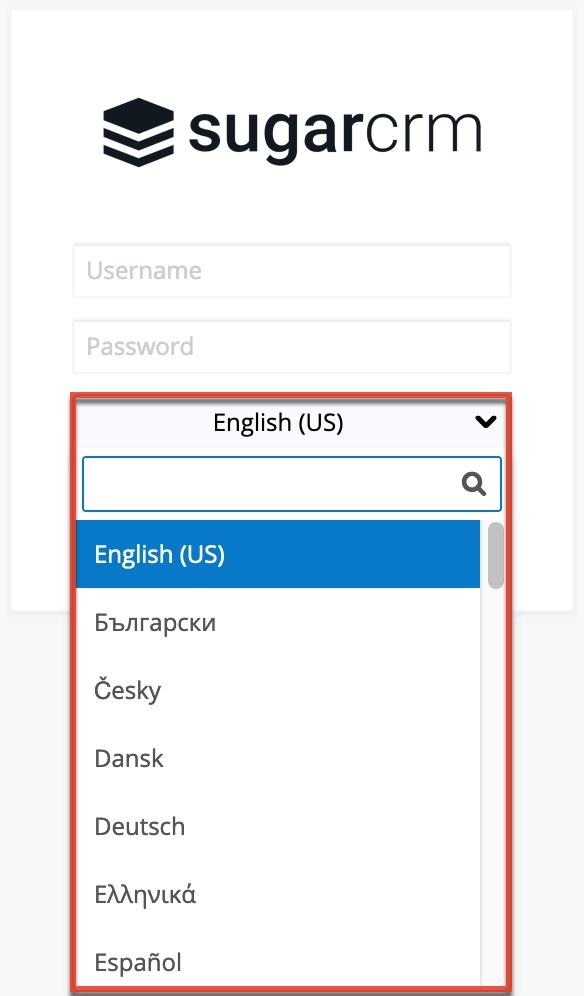
Logging Out
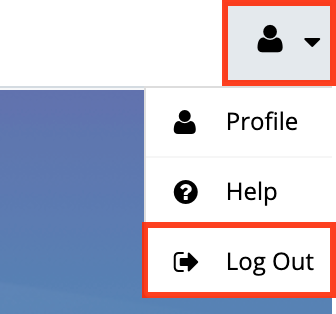
When you are done using the portal and wish to log out of the system, simply click the user profile image on the upper right of the portal and select "Log Out". This will log you out completely from the portal and you must log in again in order to access your portal account.
User Interface
Once you are logged into the portal, the portal provides you with a simple, streamlined, and intuitive user interface to access the information you need. Please note that the navigation bar displays at the top of each page in the portal for easy access to various modules (e.g., Knowledge Base), access to common actions (e.g., create, view) in the module tabs, etc. Clicking the logo icon on the far left of the navigation bar will return you back to the portal's Home page dashboard.
Navigation Bar
All pages within the portal display a navigation bar spanning across the top of the screen. The navigation bar allows you to access the Home page dashboard, various modules (e.g., Cases, Knowledge Base), as well as your user profile. There may also be a New Case button if your vendor has configured it.
The navigation bar consists of the following options from left to right:
| Navigation Item | Description |
| Home | Click the company logo icon on the far left of the navigation bar to access the Home page dashboard. |
| Module Tabs | The Cases, Knowledge Base, and/or Bugs modules display on the navigation bar. Click the module name to open its list view or click the triangle to the right of each module name to display the Actions and Recently Viewed menu. Please note that the modules available in the portal may vary depending on your vendor's configuration. |
| New Case | If the New Case button is present, you can use it to open a Create drawer to create a new case. |
| User Menu | Click the user profile image to display the user menu, which allows access to your profile as well as the Log Out option. |
Home
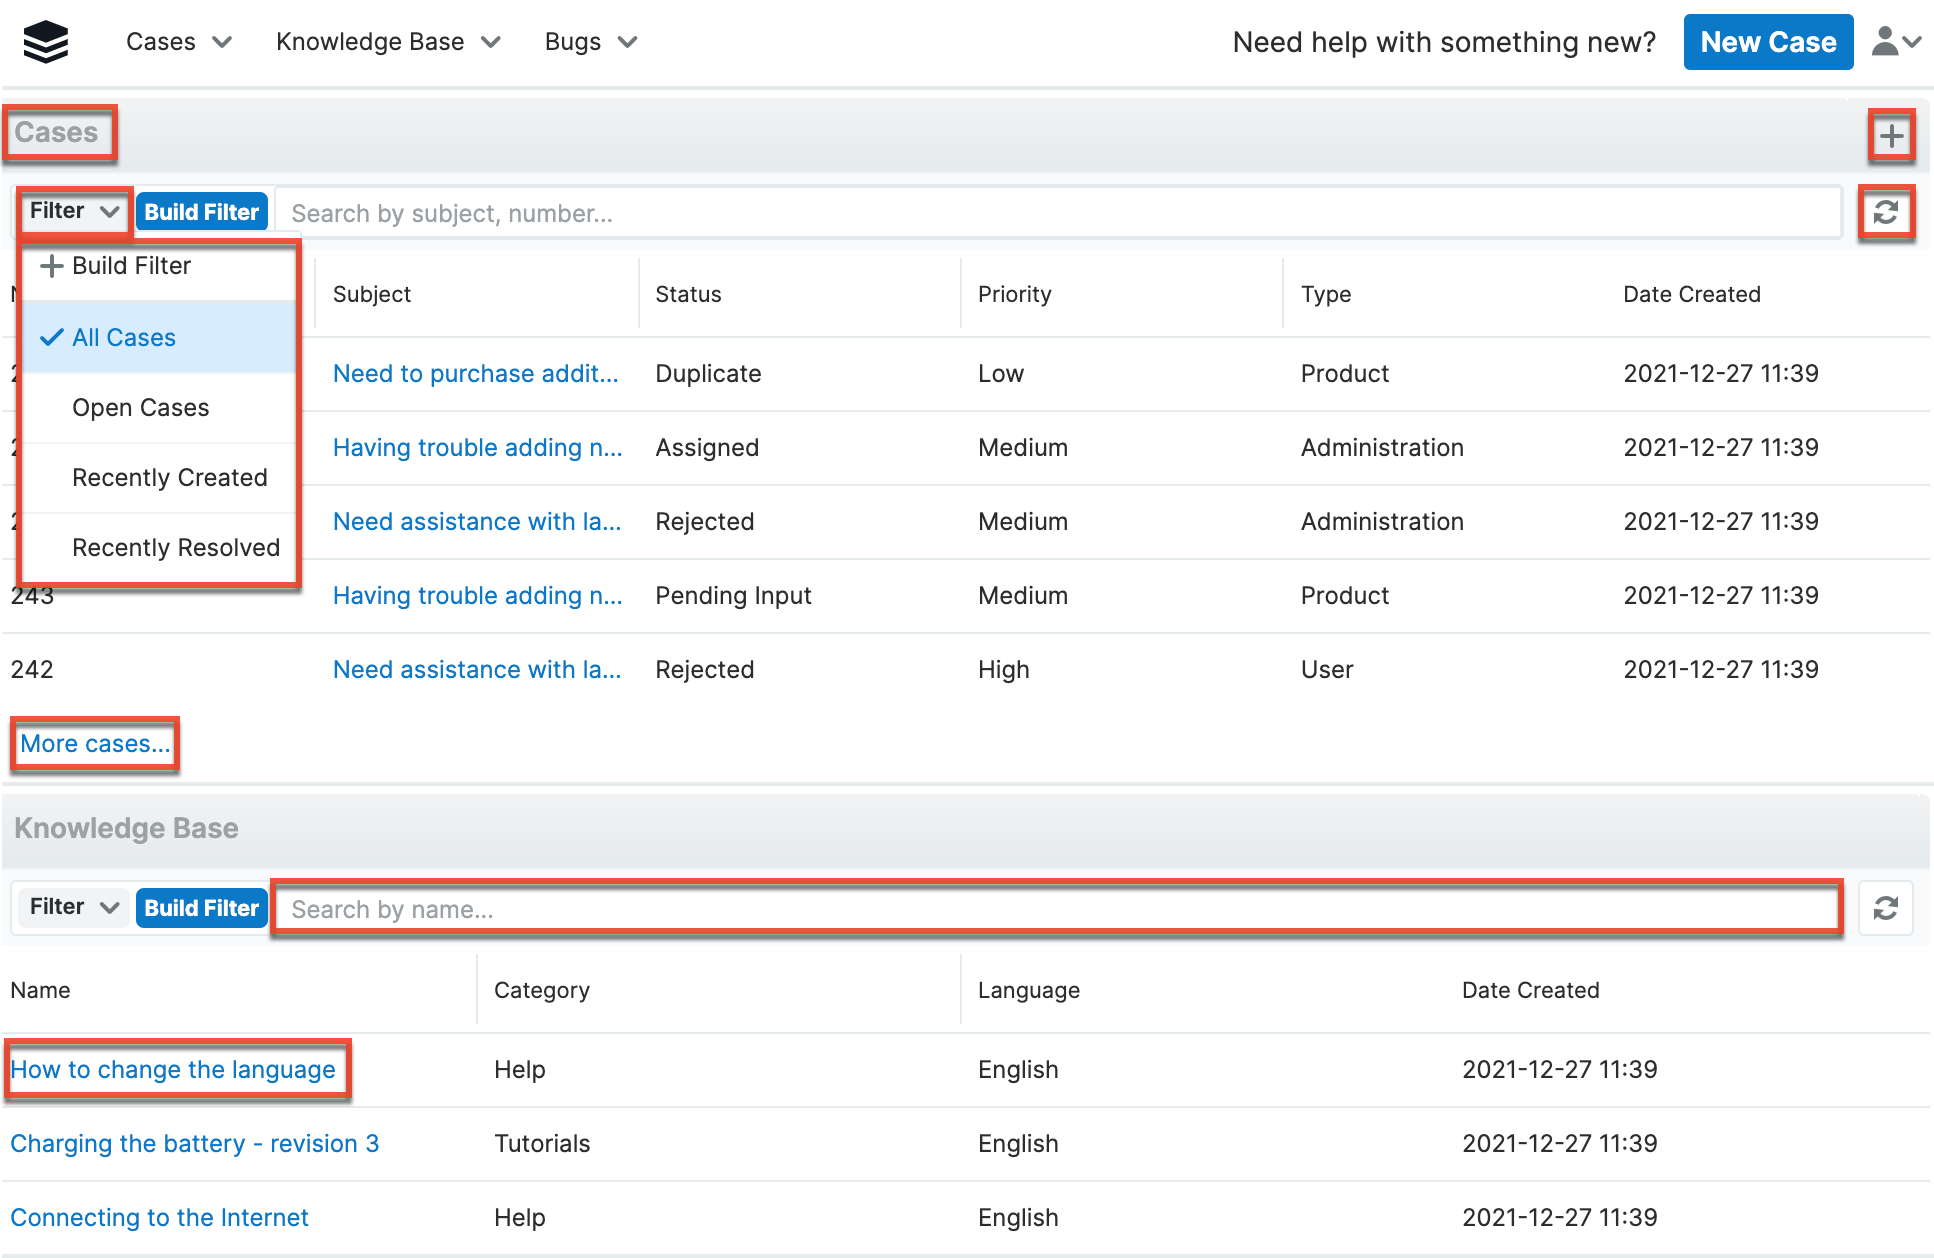
The portal's home page houses the dashboard which contains the Cases, Bugs, and Knowledge Base list view dashlets. Please note that the dashlets available in the portal may vary depending on your vendor's configuration. Each dashlet displays a list of records belonging to the module and you can view basic details (e.g., subject, status) of each record within the field columns of the dashlet or click the record's subject/name to view more details via the record view. The list view dashlet loads an initial number of records and you can click the More "Module Name" (e.g., More cases...) link at the bottom of the dashlet to load the next set of records. Please note that the dashlet's height increases slightly when loading the next set of matching results. You can manually refresh the dashlet by clicking the Refresh icon to the right of the search box.
Clicking the dashlet's title (e.g., Cases) will direct you to the module's list view. You can also create new cases or bugs by clicking the Plus button on the upper right of the dashlet and the module's record view layout will open allowing you to enter the relevant information. To perform a search in the dashlet, simply enter a search term in the search box and the relevant results will display in the list view below. You can also use the Filter option to narrow your search further using the available options as follows:
| Filter Options | Description |
| All "Module Name" | Returns all records in the module. |
| Open "Module Name" | Returns only records with an open status. Note: For the Cases dashlet, it returns all cases that are filed for your company with an open status (e.g., New, Assigned). For the Bugs dashlet, it returns all bugs with an open status that have been filed for your vendor. |
| Recently Created | Returns only records that have been created within the last 7 days. |
| Recently Resolved | Returns only closed cases for your company within the last 7 days. |
Module Tabs
Module tabs are located to the right of the logo icon on the navigation bar at the top of any portal screen. To access a specific module's list view, simply click the module's name (e.g., Cases). You can also click the triangle to the right of the module's name to display the Actions and Recently Viewed menu. The Actions menu allows you to perform important actions such as "Create Case" while the Recently Viewed menu displays the list of records you last viewed in the module. Please note that the modules available in the portal may vary depending on your vendor's configuration. 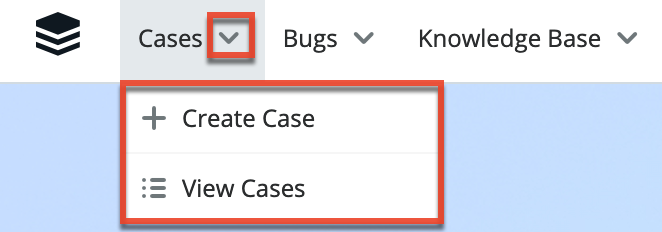
The following operations are available in the module tab's Actions menu:
| Menu Item | Module | Description |
| Create Case | Cases | Opens the record view layout to create a new case |
| Report Bug | Bugs | Opens the record view layout to create a new bug |
| View "Module Name" | Cases, Bugs, Knowledge Base | Opens the list view layout to search and display cases, bugs, or knowledge base articles |
User Menu
A profile image icon is displayed in the upper right corner of the portal where the user menu lets you access your profile, view the portal documentation, or log out. Please note that you can upload an image via your user profile to display as your main profile image in the portal. For more information on updating your user profile, please refer to the User Profile section below. Selecting the Log Out option will log you out of your current user session and direct you back to the main login page.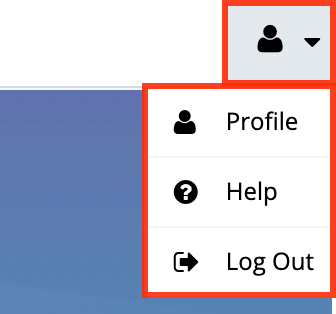
User Profile
The User Profile section of the portal displays basic information such as your name, email address, primary address, etc. that the vendor has on file in their system. If any of your contact information changes, please update your profile accordingly so that the vendor has up-to-date contact information. Please note that any changes made to your user profile will automatically be updated in the vendor's database as well.
User Fields
The User Profile contains a number of stock fields from the vendor's database as listed in the table below. Please note that depending on your vendor's configuration, the fields available to complete in the user profile may vary.
| Field | Description |
| Alternate Address | Your secondary address (e.g., billing or shipping) |
| Assistant | The name of your assistant |
| Assistant Phone | The assistant's phone number |
| Birthdate | Your date of birth |
| Date Created | The date your contact information was entered into the system |
| Date Modified | The date your contact information was last modified |
| Department | The department where you work |
| Description | A description or other information about you |
| Do Not Call | Indication that you should not be called |
| Email Address | Your email address Note: Additional email addresses can be added using the Plus button below your current address. |
| Fax | Your fax number |
| First Name | Your first name |
| Home | Your residence telephone number |
| Language Preference | Your preferred language when accessing the portal |
| Last Name | Your last name |
| Mobile | Your mobile telephone number |
| Office Phone | Your office telephone number |
| Other Phone | Your non-primary telephone number |
| Portal Name | Your username for accessing the portal |
| Portal Password | Your password for accessing the portal |
| Primary Address | Your primary mailing address |
| Salutation | Standard greeting for you (e.g., Mr., Ms., Dr., etc.) |
| Title | Your job title |
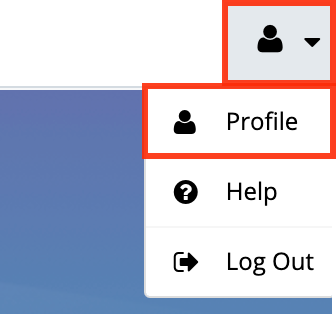
Editing User Profile
You can edit your user profile at any time by clicking the user profile image on the upper right of the portal then selecting "Profile". Once you are in the record view, you can edit individual fields without entering the full edit mode by clicking the field name (e.g., Email). Fields that are available for inline editing will display a pencil icon when hovering on the field name or value. If you wish to edit multiple fields at once via the record view, click the Edit button on the upper right of the page. Once the necessary fields have been updated, click "Save" to preserve the changes made.
Use the following steps to edit your user profile:
- Click the user profile image and select "Profile".
- Click "Edit" to make changes to your profile information.
- Enter appropriate values for the fields you wish to update.
Note: To update your portal password, enter your current password, new password, and your new password again in the Confirm Password field. The new password must conform to the password requirements configured by your vendor. - Click "Save" to preserve your profile information.

If you have updated your password, the new password will take effect the next time you log into the portal.
Creating Records in the Portal
There are various methods for creating records (e.g., cases, bugs) in the portal including via the module itself and the module's list view dashlet on the home page. The same record view layout opens when creating records by any of these methods and includes all of the relevant fields you need to report the issue to your vendor. It is highly recommended that you include as much detail as possible to help the vendor's agent to better understand the problem or question and help resolve the issue as quickly as possible without spending excessive time gathering additional information. Please note that case and bug records cannot be edited once it has been saved. If you need to add additional information (e.g., screenshots, diagnostic files) to the case or bug, you can add a related note to the record. Any additional changes to the record's details can be made by an agent from your vendor.
Note: The cases you create can only be viewed by your vendor and the portal users associated with your organization. Bugs created in the portal, on the other hand, can be seen by all other portal users and not just the portal users within your organization.
The most common method of record creation is via the individual module itself using the Create {Module} option in the module tab or Create button in the list view. This opens the record view layout in edit mode which allows you to enter all of the desired information. In addition to the create option in the module, you can also create a record via the module's list view dashlet on the home page. 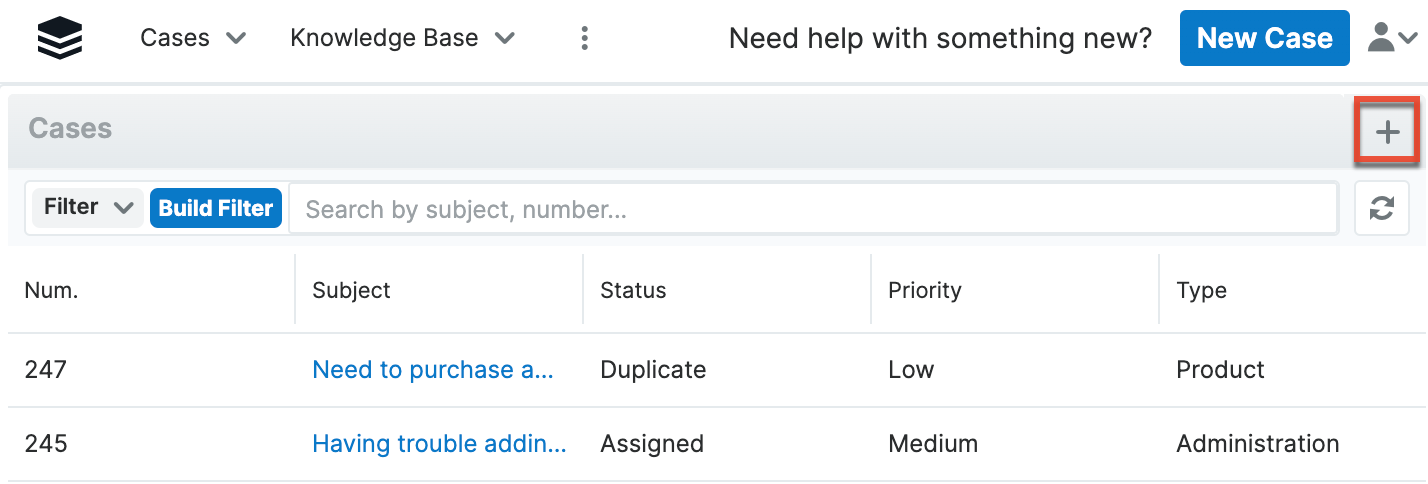
Lastly, if your vendor has enabled the New Case button, you can also use this method to create a case directly from the top right corner of the Home page:
The following steps cover creating a case via the Cases module as an example:
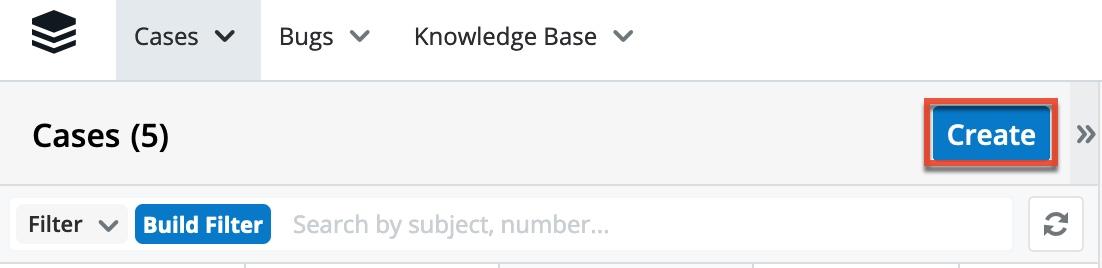
- Click the triangle in the Cases module tab to open the actions menu and select "Create Case". You can also click the Create button on the upper right of the Cases list view.
- From Cases module tab:
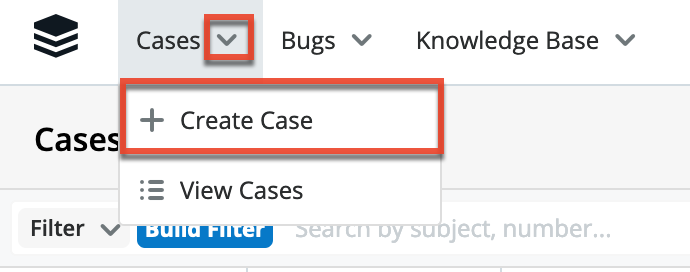
- From Cases list view:
- From Cases module tab:
- Enter appropriate values for the fields in the record view layout. All required fields will indicate "Required" in the field and must be completed prior to saving.
- Once the necessary information is entered, click "Save".
Viewing Records in the Portal
Records can be viewed from a variety of locations in the portal including via the module's list view, record view, dashlets, preview, etc. The most common method of viewing the record is via the module's list view which displays all of the module's records that meet the current search criteria. To access the list view, simply click the desired module tab (e.g., Knowledge Base) in the portal.
While the list view only shows key fields, you can click the record's subject or name to open the record view to access additional details including all relevant fields. Please note that the record view can be reached by clicking a record's subject or name link from anywhere in the portal. As you use the portal, it will keep track of the three records you most recently viewed in the particular module. Simply click the triangle in the module's tab to display the Recently Viewed menu and click the record's subject/name within the list to open it in record view.
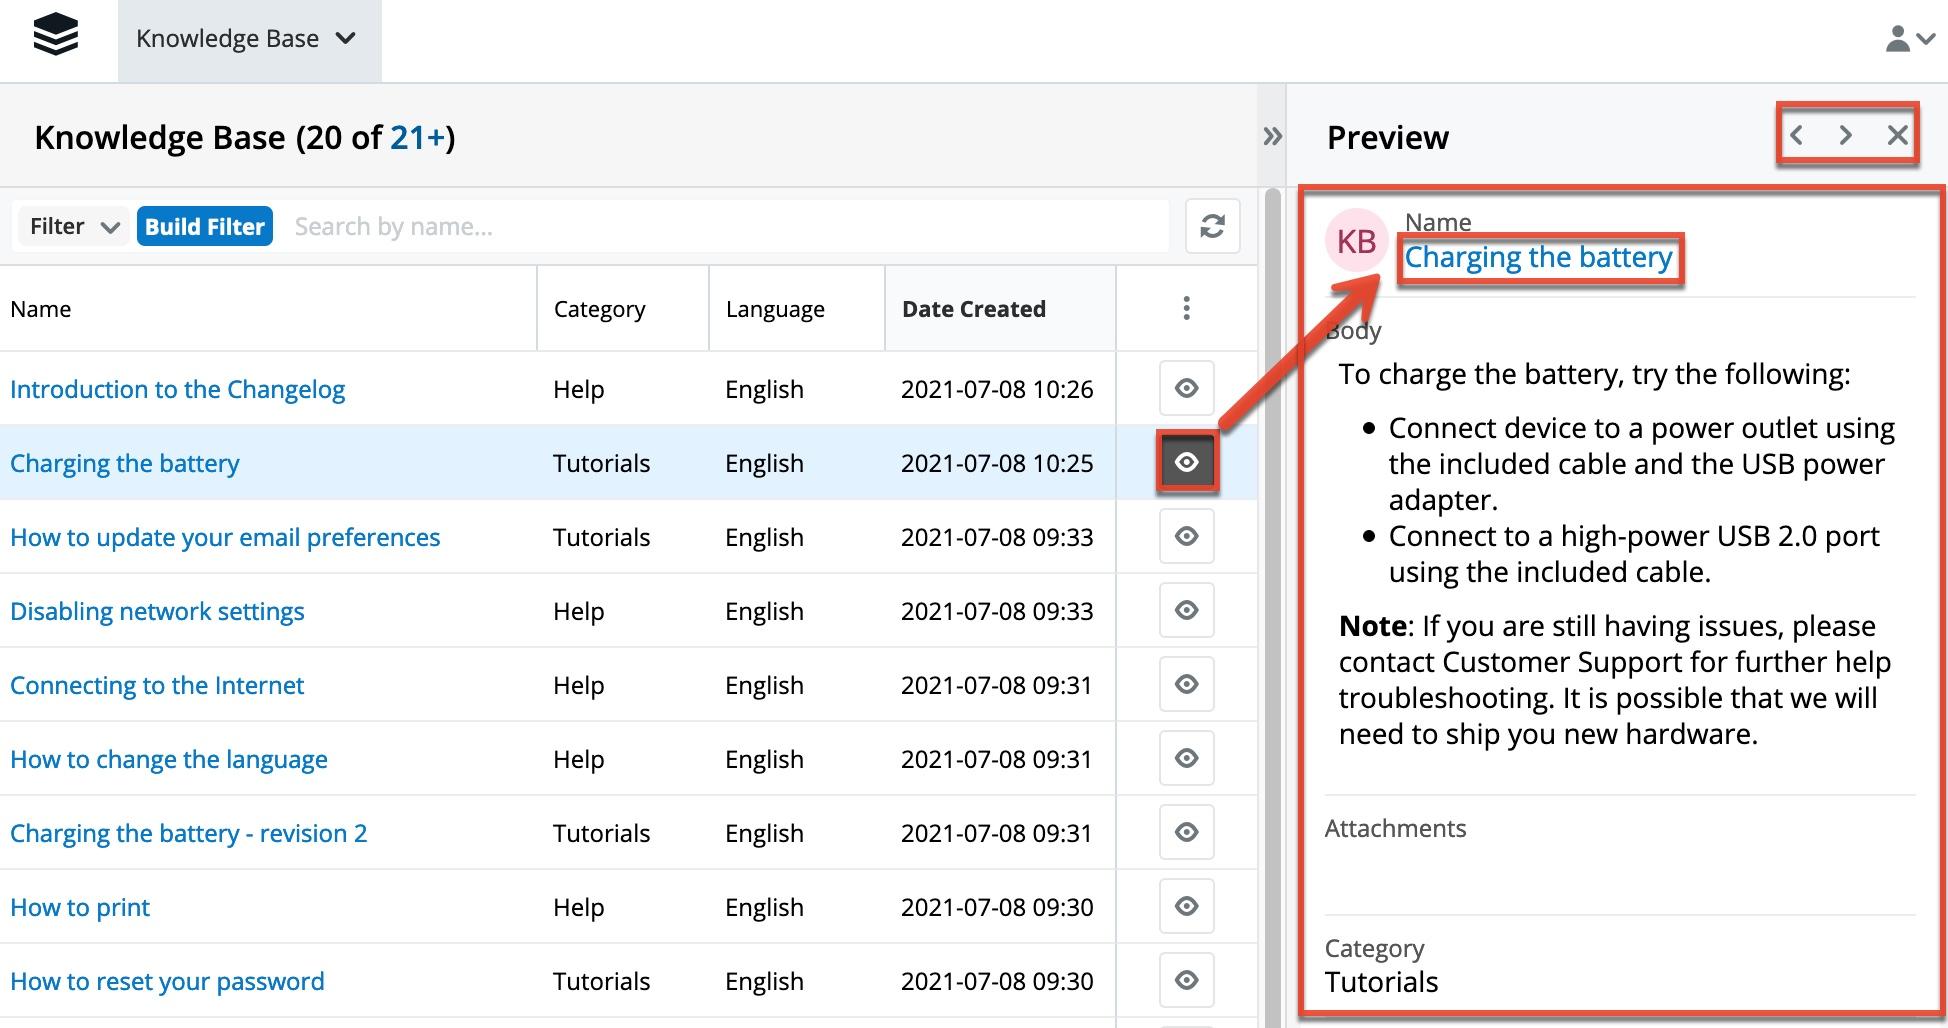
Clicking the Preview button (eye icon) to the far right of each record's row in the module's list view allows you to easily view a record's details in the right-hand side pane without leaving the list view. You can also click the record's subject or name to open it in record view. To view all of the fields on the module's record view, click the "Show more..." link below the record's fields. The left and right arrow buttons at the top of the right-hand side pane allow you to preview the next or previous record of the current list. To close a preview, simply click the "X" to the right of the arrows.
The dashlets on the home page also allow you to get a quick view of various records in the module and you can view basic details of each record within the field columns of the dashlet or click the record's subject/name to view more details via the record view. For more information on using the dashlets, please refer to the Home section.
Searching for Records in the Portal
Each module's list view includes a list view search to help you easily locate records by subject, name, or number (only for cases and bugs) in a module-specific manner. Simply enter a keyword in the search box and the search results will begin appearing in the list view below once you enter at least one character. Please note that the portal automatically appends the wildcard character (%) to the end of your search phrase which will only return records that start with the keyword entered in the search. If you would like to broaden the search, you can use the wildcard at the beginning of your text as well (e.g., %error).
In addition to the list view search, you can search for cases, bugs, and/or articles via the list view dashlets on the home page by entering a search term in the search box. The relevant results matching your search will display in the list view below. You can also use the available Filter options to narrow your search further.
List View Search
List view search enables users to easily search by the record's name within an individual module and pull up matching records in the list view. The search also provides a Filter option allowing you to narrow your search further using the available options. The following default filters may be available in each module:
- Build Filter: Create a new custom filter that you can use to filter your search
- Note: You can also click "Build Filter" to the right of the Filter option.
- All "Module Name": Returns all records you have access to in the module
- Open "Module Name": Returns all records in the module with a status that is not closed
- Recently Created: Returns only records that were created in the module within the last 7 days
- Recently Resolved: Returns only records that were closed within the last 7 days

When you choose a filter, the portal will return records that match both the selected filter and any search query provided in the open Search box in the filtered list view results. For example, if you select "Recently Created" in the Filter options and enter a query in the Search box, Sugar will only return records that have names that match the search term and were created in the last 7 days. Once the search is complete, the relevant results will populate in the list view below the search bar. 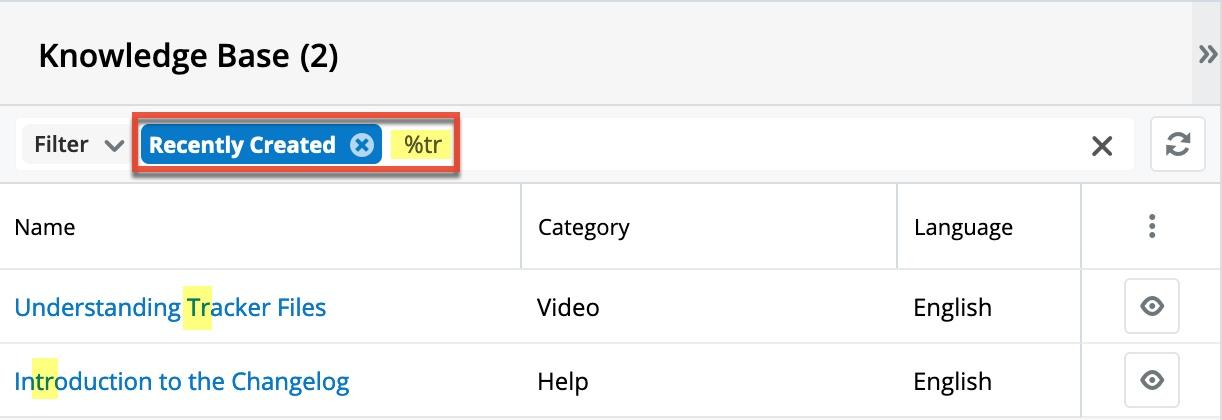
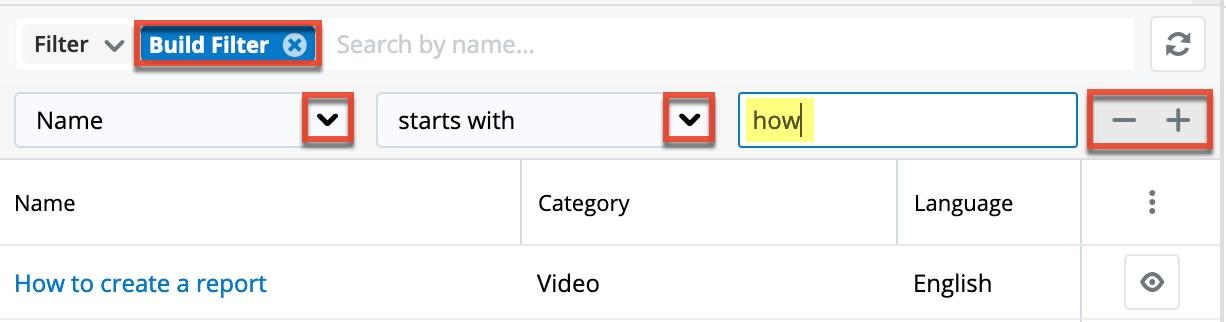
Note: The yellow highlighting in this image has been added for effect and will not appear in the application.
When you perform a search using a filter from the filter list, the filter will continue to apply if you navigate away from and then return to the module's list view. Any text query entered in the open Search box, however, will not be preserved.
To see all records to which you have access, simply select the All "Module Name" (e.g., All Articles) option in the filter and remove any text from the search bar: 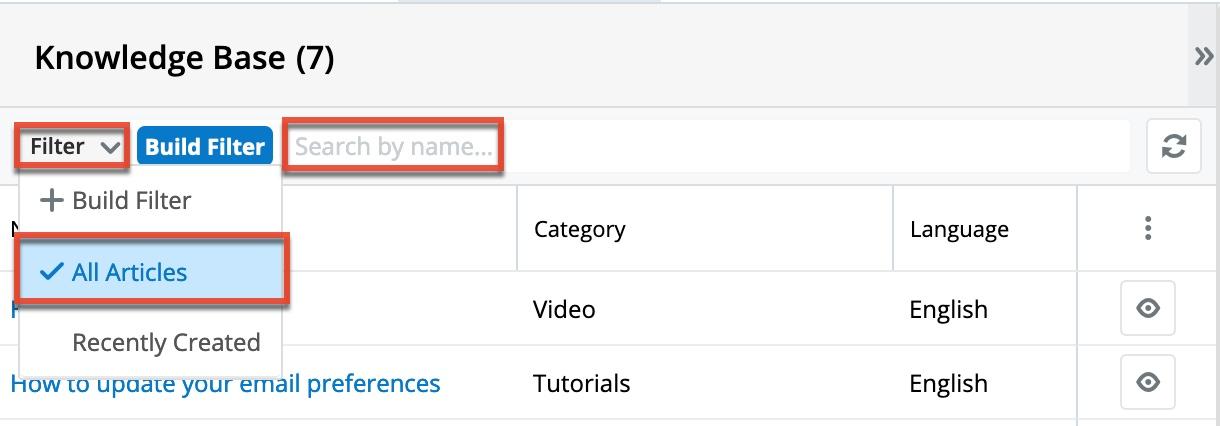
To clear an applied filter, click the "x" on the selected filter option in the Search box; to clear a text query from the search, click the "x" on the right end of the search box: 
To update the filtered list view with the most recent results, click on the Refresh icon to the right of the search box: 
Creating a Filter
Users can also create new filters via the Build Filter option in the Filter list of the search bar. This allows users to add custom, complex filter options when searching in the module's list view. You have the option to add multiple fields to your new filter by clicking the Plus button to the right of the filter selection dropdown lists and set select operators along with their value(s). A filter's criteria need to be true for a record in order for it to appear in the list view search result.
When you run a search using a created filter, the search will be preserved when you navigate away from the module. Returning to the list view will automatically display the results of your last filter.
The following steps cover creating a new Name filter in the Knowledge Base module as an example:
- Click the Filter option on the Knowledge Base search bar then select "Build Filter".
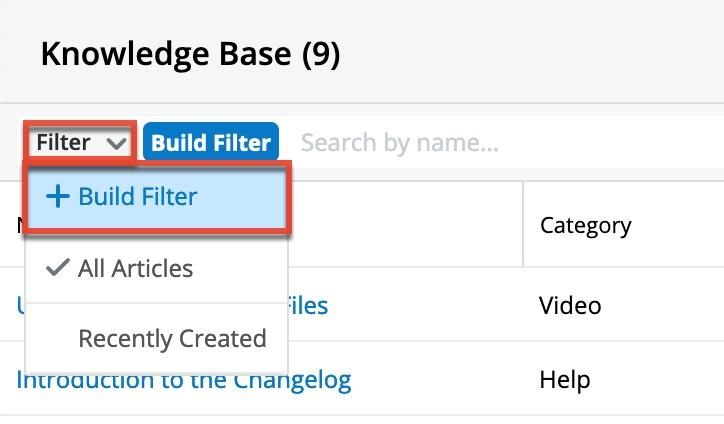
- You can also click "Build Filter" to the right of the Filter option.
- Select the Name field to add to your filter as well as the condition and matching criteria.
- To add additional fields to the new filter, click the Plus button to the right of the filter.
- To remove fields from the new filter, click the Minus button to the right of the filter.
- To clear any filter values, simply click the "x" to the right of the value or click the "x" in the blue Build Filter button in the search bar to clear them all at once.
The list view will automatically display results matching your filters as you create and modify the criteria. To view the most recent matching records for an existing filter, click on the Refresh button to the right of the search box.
Understanding List View Search Behavior
When searching for cases or bugs by number, you must enter the exact number in order to return a match. For example, if you search for "4", the search will return case number 4 as a match, but will not return case numbers 40, 41, 420, 4040, or any other case records whose numbers start with or contain the number "4". However, if any cases have a subject that begins with the number 4 (e.g., 400 error on startup), then the search will return both case number 4 as well as any records with a subject that begins with "4".
Please note that only the document's name can be used to search for articles in the portal. Search will not return results based on the body of the knowledge base article or any other fields in the record.
When searching for records by subject or name, the portal automatically appends the wildcard character (%) to the end of your search phrase. This means that the system will retrieve all records that start with the exact keyword or phrase entered in the search box. If you would like to broaden your search results, you can use the wildcard character (%) at the beginning of your search text as well which will pull up any record containing the word regardless of how it starts or ends. So, for example, a search for "error" will return any case record that begins with the word "error" such as "Error occurs while running query"; whereas, a search for "%error" will return any case record that contains the term "error" in its subject such as "Console error on page".
When combining multiple criteria, such as a search and a filter or two filters, the list view uses the "and" operator. This means that if you are searching against multiple fields in your filter option, the portal will place an "and" in between each search field returning only records matching all (as opposed to any) of your search criteria. For example, if you select "Recently Created" in the Filter options and enter a record name, the portal will only return records with a matching name that were created in the last 7 days.
The only time the portal will use the "or" operator is when using a multi-select option in the search criteria. For example, you can create a custom filter for the Cases list view search and select "Status", "is any of", then add "Rejected" and "Duplicate". If you perform a search based on this new filter, the system will return cases that match any one of the values specified in the filter. For more information on creating custom filters, please refer to the Creating a Filter section.
Please note that if any additional fields (e.g., Priority) are added to the custom filter, the operators between the Status field and the other fields will be an "and" operator.
Module List View
A module's list view displays all records meeting the current search criteria. You can view the basic details of each record within the field columns of the list view or click the record's subject or name to open the record view. To access a module's list view, simply click the module tab (e.g., Knowledge Base) in the navigation bar at the top of the screen. The module's list view provides the following information and capabilities:
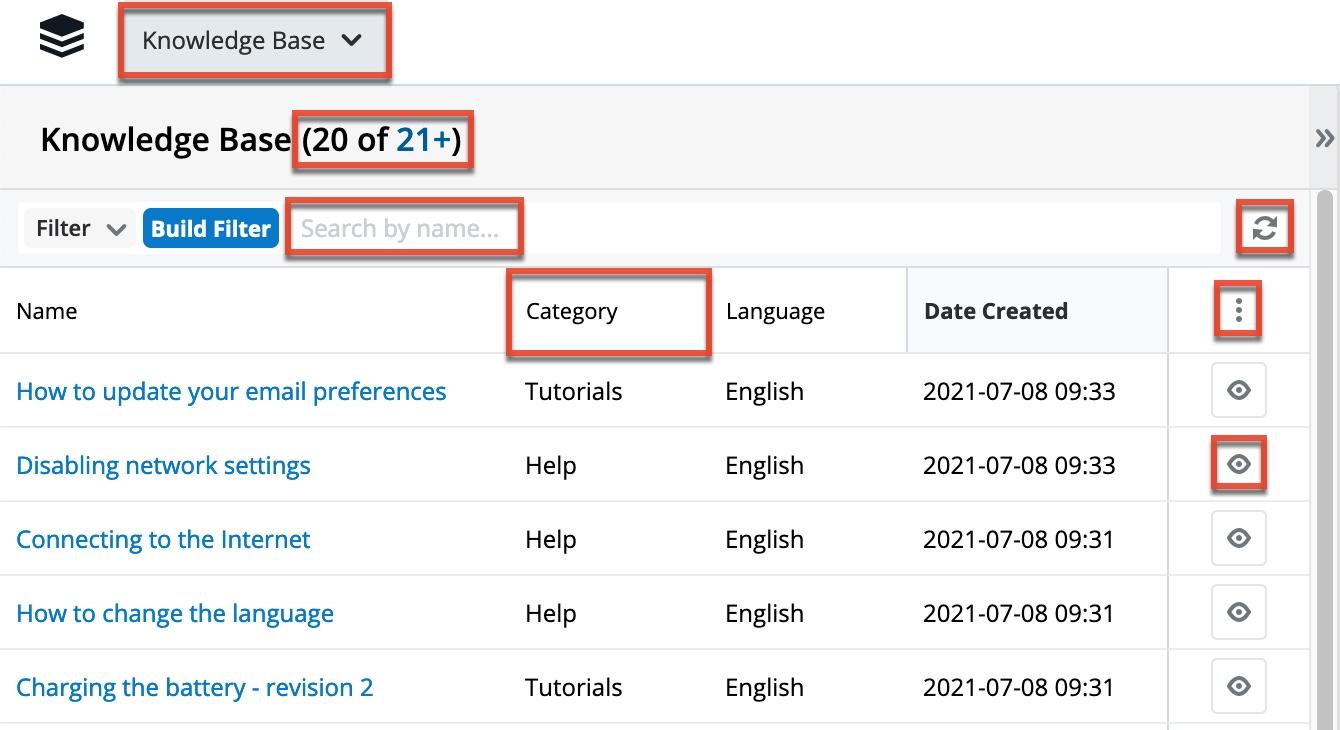
- Record Count: The list view displays the total count of records on the upper left of the screen next to the module name. The count will capture the total number of records displayed on the current set of list view results. If there are additional records in the list view results set, a hyperlinked number (e.g., "21+") will display to the right of the initial count. Simply click the hyperlinked number in the parentheses to view the total count of all records in the list view result set.
- Create Record: Click the Create button on the upper right of the module's list view to create new record's in the module.
- List View Search: To search for a specific record within a module or for a list of module records, use the search bar and filter located above the module's list view. Simply enter a keyword in the search box or use or create a filter and the search results will begin appearing in the list view below once you enter at least one character.
- Refresh Search Results: Click the Refresh button to the right of the search box to load the most current list of matching records without reloading the browser or losing any filter or search criteria you may have set.
- More Records: The list view loads an initial number of records meeting the current search criteria with the option to show additional results upon request. By default, the portal displays 20 records per list view results set, but the vendor can change the number of records to display in the list view. To load the next set of list view results, simply click the More "Module Name" link (e.g., More knowledge base articles...) at the bottom of the list view.
- Column Sorting: Sort all of the current search results by a field column in either ascending or descending order by clicking the column header noting that the fields which allow sorting will have a pair of arrows. Please note that the list view may be sorted by only one column at a time.
- Column Resizing: Adjust the size of the columns by placing your cursor on the column divider, and when the left-and-right arrow appears, click and drag the column to the desired size.
- Column Selection: Personalize the list view by specifying which fields you want to be displayed in the list view. Click the three-dot menu to the far right of the list view column headers to see the list of available fields. Click a field name to toggle whether or not it is included as a column in your list view.
- Preview: Click the Preview button (eye icon) to the far right of each record's row in the module's list view to view a record's details via the right-hand side pane.
Module Record View
The module's record view displays thorough information regarding the record including all relevant fields (e.g., subject, name, status). The record view can be accessed by clicking a record's subject or name link from anywhere in the portal including from the module's list view. On the upper right of the record view, there are two buttons that allow you to page through each record in the module's list view's current search results. Clicking the Left arrow button displays the previous record of the current search results while clicking the Right arrow button displays the next record of the current search results. In addition, clicking the double arrow icon to the right of the Left and Right arrow buttons will expand the record view to the full-screen width and hide the preview pane. To reduce the record view's width and reveal the preview pane, simply click the double arrow icon again.
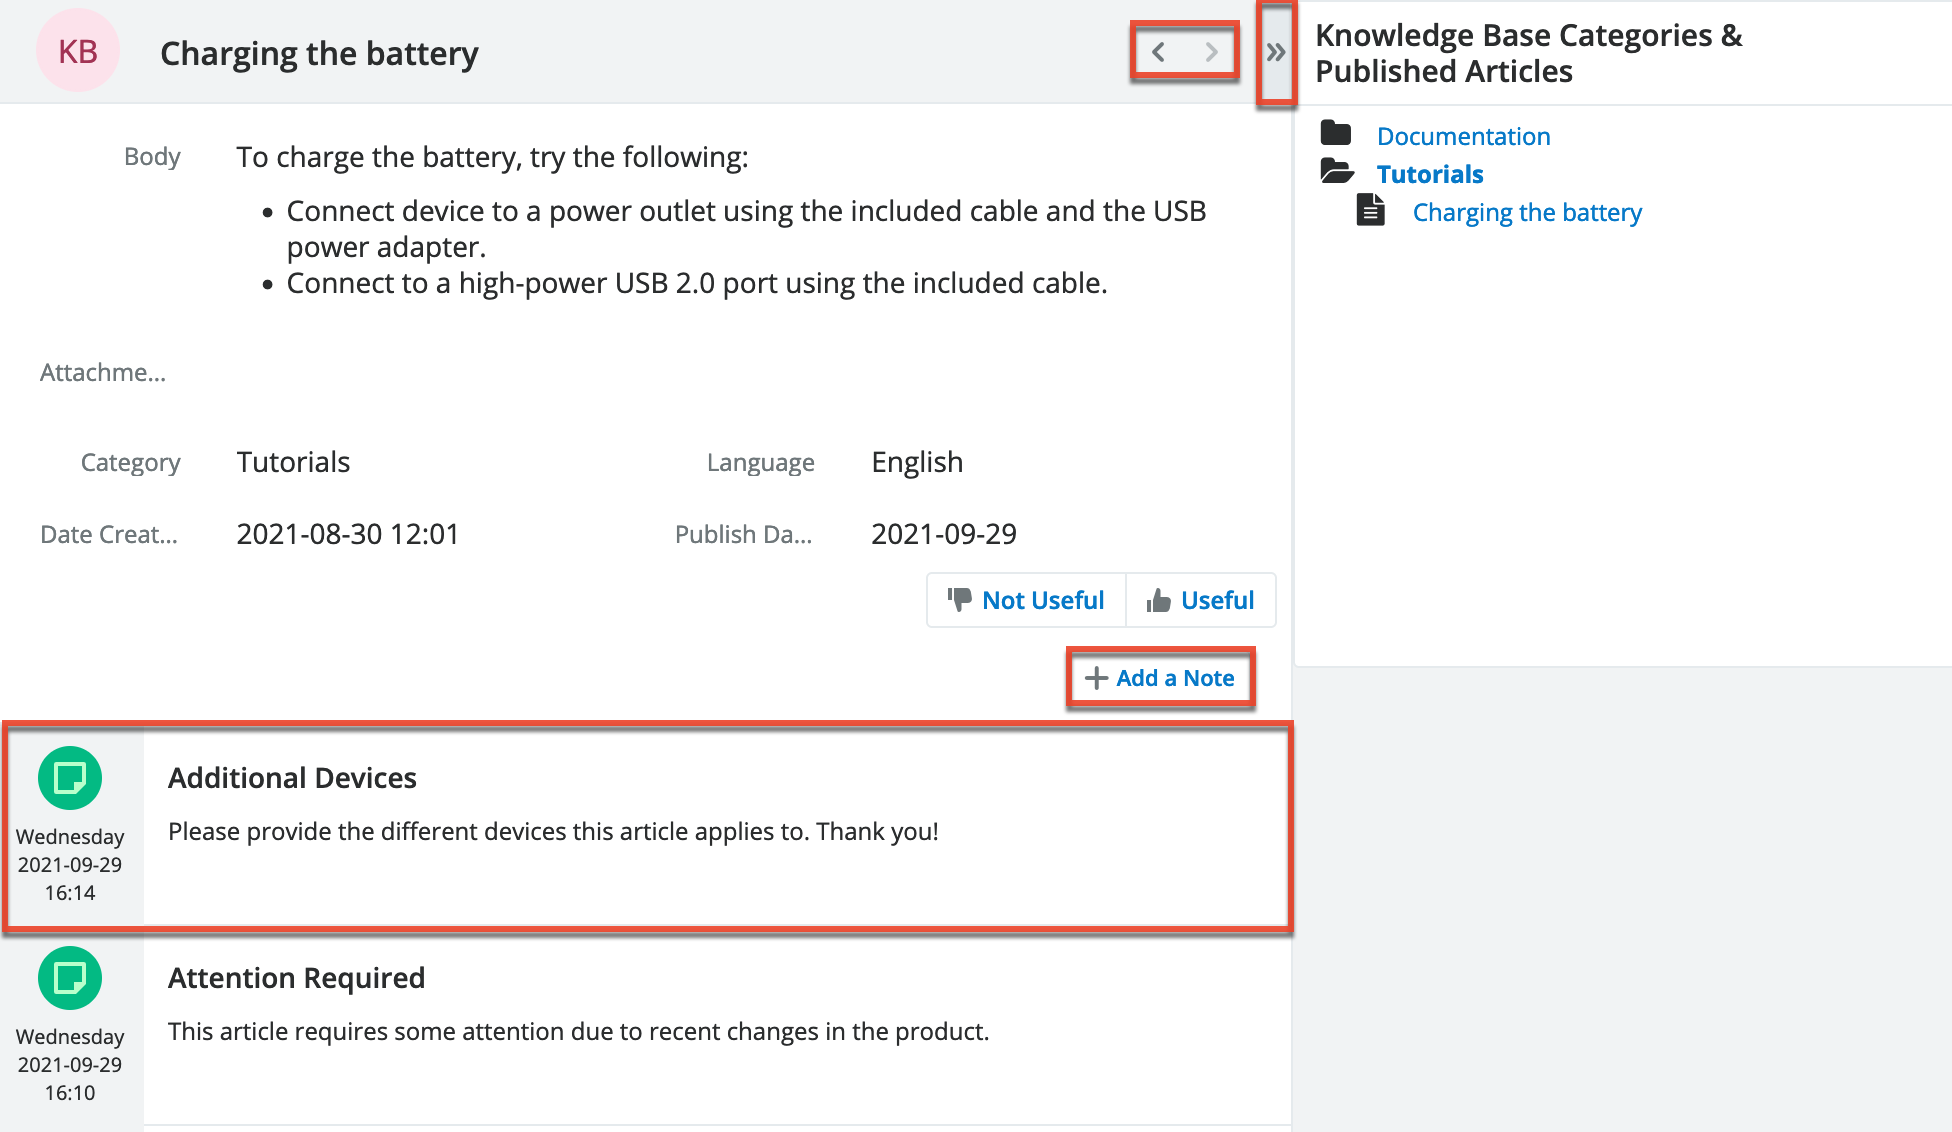
If notes are available for the module, you can also view any notes you or the vendor has posted to the record, which will appear beneath the record's fields. If there are any files attached to the note, you can download them by clicking the file name or clicking the Download All button. If there is only a single image attached, the image is displayed directly within the note and the full-sized version can still be opened by clicking it. Refer to the Adding Notes to Records section below for details on how to create a note.
Adding Notes to Records
Notes in the portal can be used as a method of communication between you and the vendor regarding a case, bug, or knowledge base article if the vendor has enabled notes for the Knowledge Base module. This helps ensure that all communications related to the record are preserved and can be easily viewed via the module. You can add related notes to the record to provide any comments, additional information, or ask any questions you may have to the vendor. Once the note is added, it will appear at the bottom of the module's record view and your vendor will be able to view the note(s) related to the record as well. Please note that notes related to a case will only be visible to portal users who have access to that case while notes related to bugs and knowledge base articles will be visible by all portal users with access to the vendor's portal.
Note: There is a 30-second timeout limit for all uploads.
The following steps cover adding a note to a knowledge base article as an example, assuming the vendor has enabled notes for the Knowlege Base module:
- Navigate to a knowledge base article's record view.
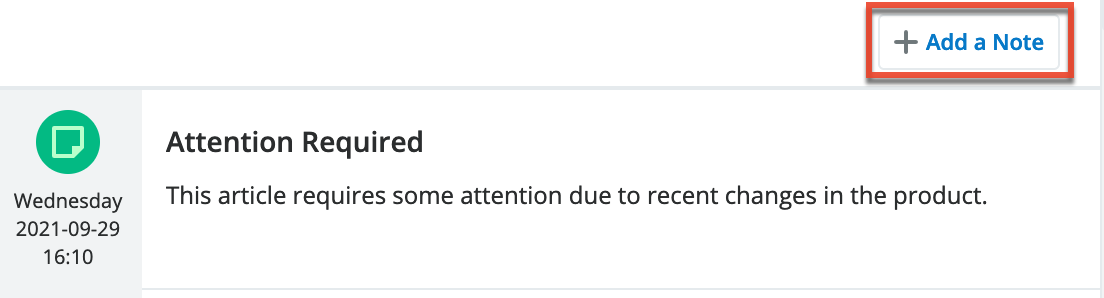
- Click the "Add a Note" button below the knowledge base article's fields.
- Enter appropriate details for the fields (e.g., Description) in the record view form and click the Browse button if you wish to attach any files to the note. All required fields will indicate "Required" in the field and must be completed prior to saving.
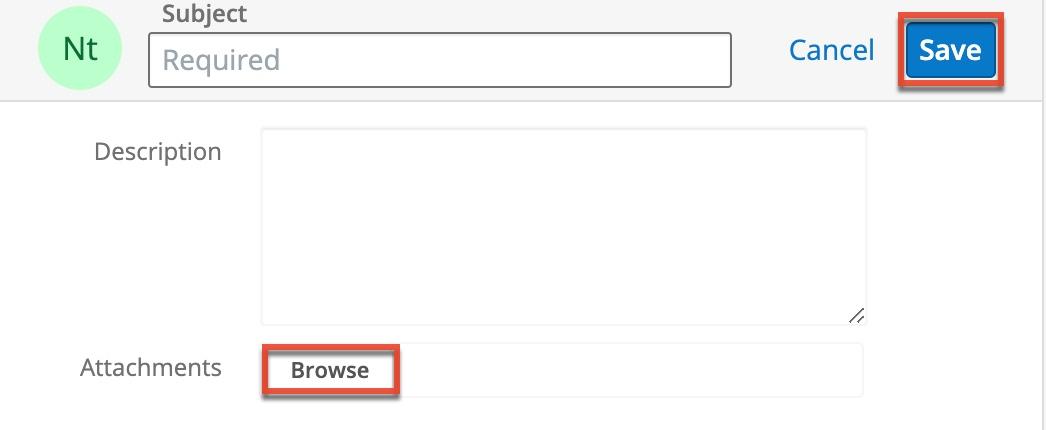
- Once the necessary information is entered, click "Save" to preserve your note.
Note: Note records cannot be edited once saved.
Cases
The Cases module displays all cases that have been filed for your organization and allows you to create and submit a new case to your vendor as well as access any existing cases to view or add notes. To access the list of cases, simply click the Cases module tab in the navigation bar to open the list view. Please note that cases can only be viewed by portal users associated with your company and any portal users outside of your company will not be able to view your organization's cases.
Once the list view opens, you can easily search by the case's subject or number to pull up matching records or use the Filter option to narrow your search further using the available options as follows:
| Filter Options | Description |
| All Cases | Returns all case records in the module |
| Open Cases |
Returns only cases with an open status (e.g., New, Assigned) that are filed for your company |
| Recently Created | Returns only case records that have been created within the last 7 days |
| Recently Resolved | Returns only closed cases for your company within the last 7 days |
Cases Fields
The Cases module contains a number of stock fields from the vendor's case management database that will be used to enter all relevant information when creating the case. Please note that the fields available in the case's record view may vary depending on your vendor's configuration and that some are read-only.
| Field | Description |
| Attachments | Any files attached to the case Note: Portal users can add attachments when creating a case but cannot add or remove attachments after it is created. |
| Case Number | A number to identify every case |
| Date Created | The date the case was created |
| Date Modified | The date the case was last modified |
| Description | Explanation of the details and reproduction steps of the case when submitted |
| Priority | The level of urgency for the issue being reported |
| Resolution | Results of the investigation into the problem |
| Resolved Date | A system-generated date and time that the case is set to "Closed" |
| Status | The case's current level of progress as the vendor's support team works through the case Note: This field is read-only and is set to "New" when creating a new case. |
| Subject | Brief description of the issue being reported |
| Type | Type of categorization that this case falls into, such as "Administration", "Product", etc. |
| Work Log | A chronological list of activities and actions taken by the customer service agent while working on the case |
Case Timeline
The Case timeline, displayed at the bottom of a case's record view, shows a summary of the emails, notes, and messages (i.e., chats) that have taken place related to the case in chronological order. Each interaction is displayed as a card containing the details of the communication. Email cards show the sender and recipients, subject, body, attachments, and date sent while note cards show the subject, description, attachments, and date created. If a record is modified after the time it is created, the date modified is also shown at the bottom of the card.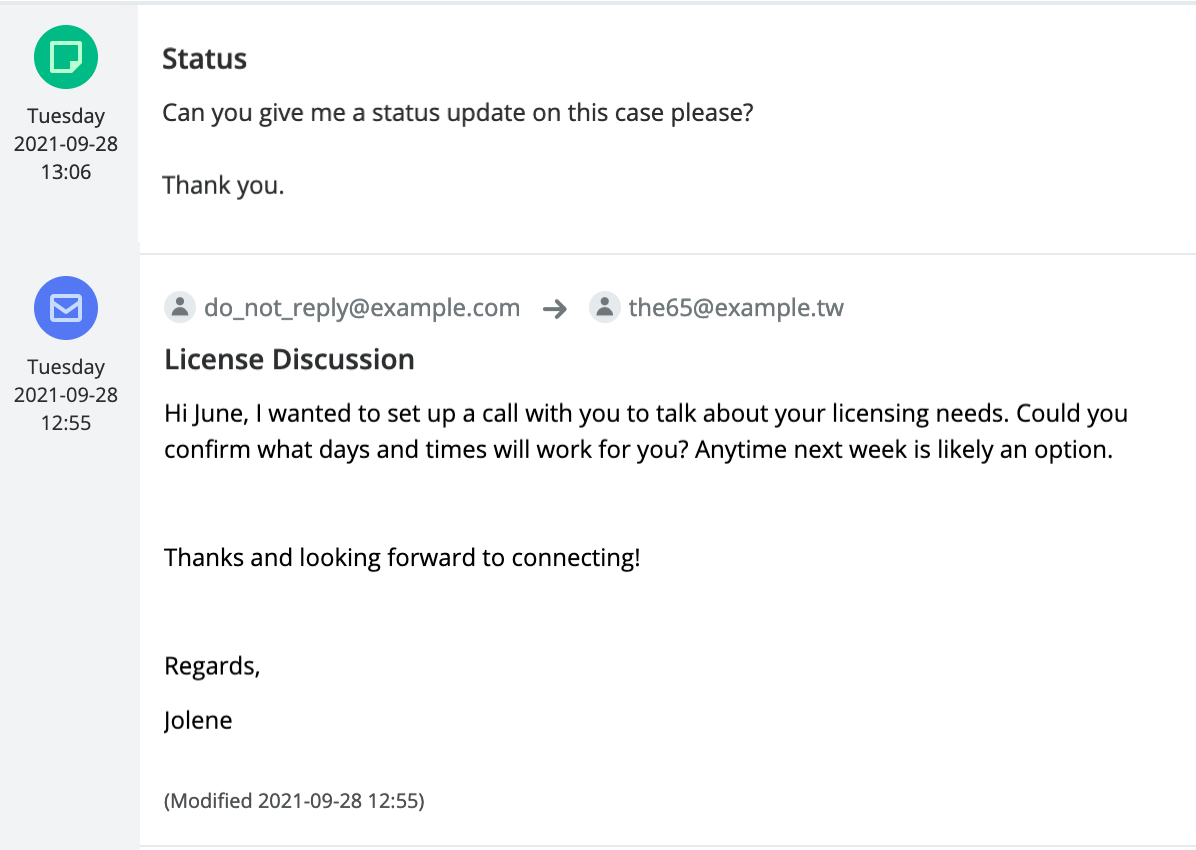
Bugs
The Bugs module displays a list of new, in progress, and closed product defects and feature enhancements that have been reported to your vendor or that the vendor has filed in their system. You can also add notes to the bug if you have any questions or comments that you wish to communicate to your vendor. To access the list of bugs, simply click the Bugs module tab in the navigation bar to open the list view. Please note that filed bugs are visible to all portal users with access to the vendor's portal and not just to portal users within your organization.
Once the list view opens, you can easily search by the bug's subject or number to pull up matching records or use the Filter option to narow your search further using the available options as follows:
| Filter Options | Description |
| All Bugs | Returns all bug records in the module |
| Open Bugs |
Returns only bugs with an open status (e.g., New, Assigned) that have been filed for your vendor |
| Recently Created | Returns only bugs that have been created within the last 7 days |
Bugs Fields
The Bugs module contains a number of stock fields that will be used to enter all relevant information when reporting the bug. Please note that the fields available in the bug's record view may vary depending on your vendor's configuration.
| Field | Description |
| Category | The general area of the product or service where the bug was discovered |
| Date Created | The date the bug was created |
| Date Modified | The date the bug was last modified |
| Description | Explanation of the details and reproduction steps of the bug when submitted |
| Number | A number to identify every bug |
| Priority | The issue's level of urgency |
| Resolution | The final reason the issue was closed or, for open issues, a more granular breakdown of its current status |
| Resolved Date | A system-generated date and time that the bug is set to "Closed" |
| Source | The method in which this bug was submitted, such as internal or from a customer |
| Status | The bug's current level of progress as it moves along the process from submission to resolution |
| Subject | Brief description of the problem being reported |
| Type | Type of categorization that this bug falls into, such as "Defect" or "Feature" |
| Work Log | A chronological list of activities and actions while the bug is being worked on by the vendor |
Knowledge Base
Once the list view opens, you can easily search by the article's name to pull up matching records or use the Filter option to narrow your search further using the available options as follows:
| Filter Options | Description |
| All Articles | Returns all knowledge base records in the module |
| Recently Created | Returns only articles that have been published within the last 7 days |
You can click the article's name in the list view to open its record view and access additional details. If the article you are viewing contains any attachments, you can click the file pill (e.g., Additional Instructions.docx) in the Attachments field or click the Download link to the right of the field to download the attachment as a .zip file to your local machine. Please note that if the article has more than one attachment, the Download All link will display instead allowing users to download all attachments as a .zip file at once. While viewing the article, you also have the option to rate the article's usefulness by clicking the "Not Useful" or "Useful" buttons. Your rating will be captured in the vendor's system, which will help them determine which articles should be improved or updated, and which should be promoted as valuable information.
Knowledge Base Fields
The Knowledge Base module contains a number of stock fields from the vendor's Knowledge Base. Please note that the fields that appear in the knowledge base's record view may vary depending on your vendor's configuration.
| Field | Description |
| Attachments | Any files attached to the article |
| Body | The content of the article |
| Category | The category or topic specific to the article |
| Date Created | The date the article was created |
| Date Modified | The date the article was last modified |
| Description | A description or other information about the article |
| Name | The name of the article |
| Expiration Date | The date on which the article information will expire and no longer be available in the portal |
| Revision | The article's current revision number |
| Language | The language used in the article |
| Publish Date | The date the article was published |
| Status | The current status of the article |
Knowledge Base Categories & Published Articles Dashlet
The Knowledge Base Categories & Published Articles dashlet displays in the Knowledge Base list view and record view and allows you to easily navigate the hierarchical structure of categories to locate published knowledge base articles. The folder icons represent categories while document icons represent articles. You can click the folder icon to expand and display the child categories and published articles. Clicking the article's name in the dashlet will open the article in record view. When viewing the dashlet in the Knowledge Base record view, the relative category will be expanded to display the current article you are viewing. 
Sugar Portal Chat
If your vendor offers communication via chat in the portal, you will see a chat bubble button in the bottom right corner of the portal. Click the chat bubble to start a chat session. This could either connect you directly to a customer service agent or sales representative or connect you to a chatbot that allows you to perform certain actions or make certain requests, depending on how your vendor has it set up.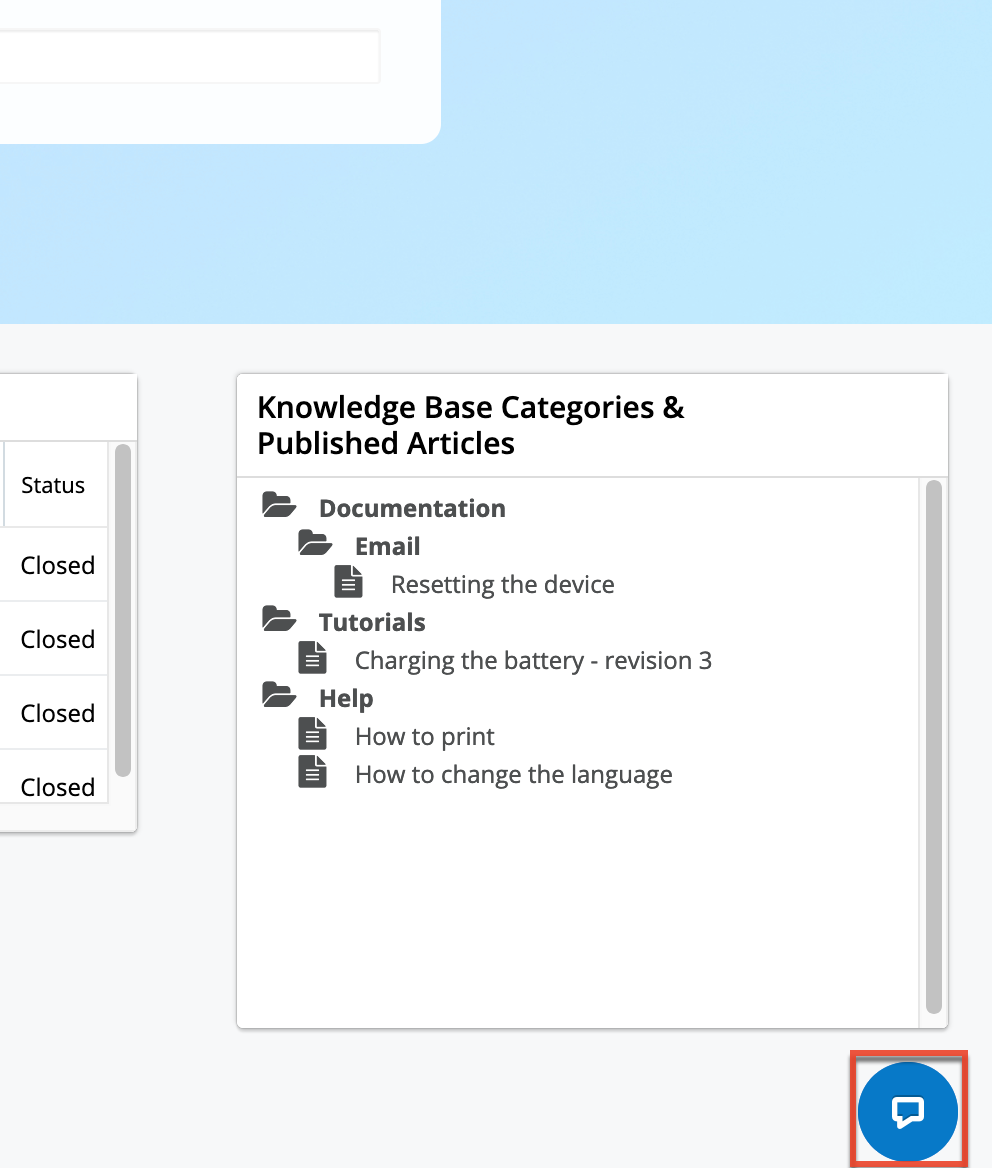
When you start a chat, that chat window opens and you can read incoming messages from the system or an agent and type in the text box to respond. Press Enter or Return on your keyboard to send a message that you have typed.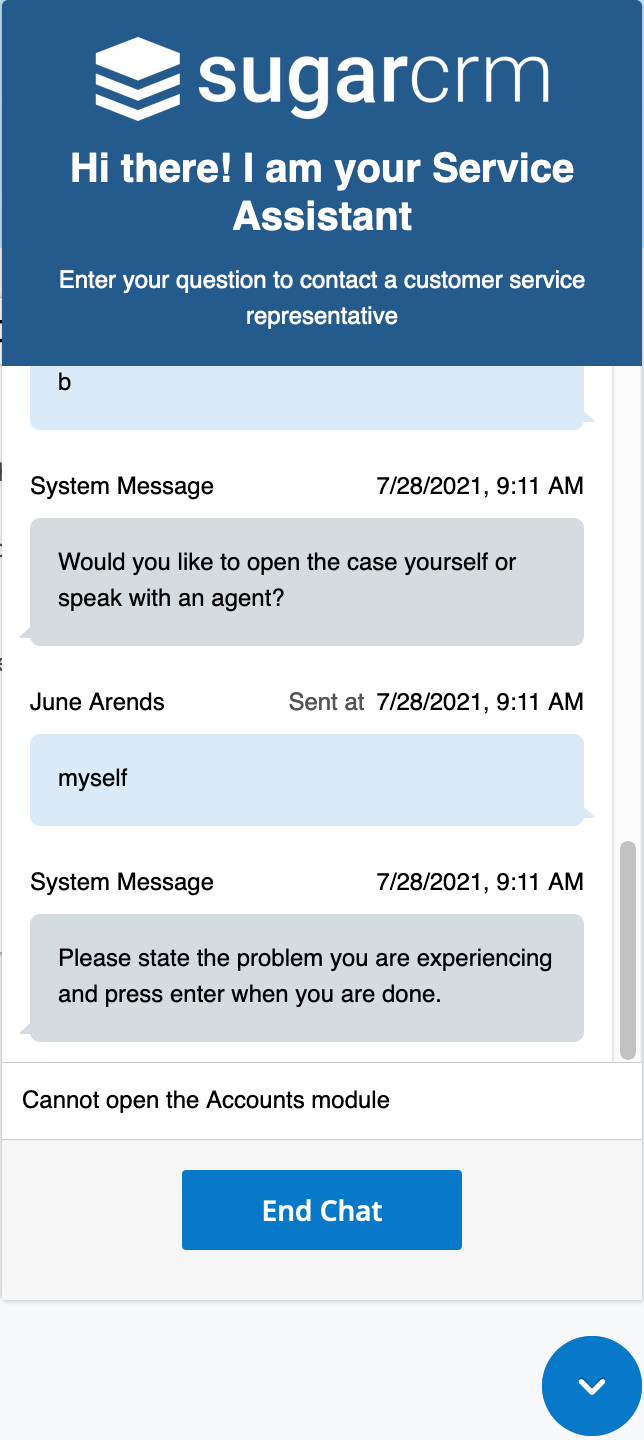
If you are using a chatbot to perform an action, any access restrictions that apply to records in the portal also apply in the portal chat. For example, if you use a chatbot to check the status of a case, you can only do so for cases that were filed by your company and to which you have access.
The chat window stays open as you navigate through most screens of the portal, but you can minimize it using the down arrow button and open it again at any time to resume your conversation. When you are done chatting, click the End Chat button to close the chat session. Note that refreshing your browser while in a chat will end the session, whether it is minimized or maximized at the time.
Note that Sugar Portal Chat is only supported for use with certain web browsers. For more information, refer to the Supported Platforms page.