Documents
Overview
Sugar's Documents module gives your users a way to access and update company-specific files. You can create a library of documents and graphics that you can share with other users and contacts, ranging from marketing collateral, contracts, internal policies, and customer-distributed content. There are various ways you can create documents in Sugar such as via the Documents module and via the quick-create menu. Once the document record is created, you can view and edit information pertaining to the document via the Documents record view. Each document record may then relate to other Sugar records such as accounts, contacts, and many others. This documentation will cover information and actions specific to the Documents module. For instructions concerning views and actions that are common across most Sugar modules, such as creating, editing, and deleting documents, please refer to the Working With Sugar Modules section of this page.
Document Fields
The Documents module contains a number of stock fields that come out-of-the-box with Sugar. For information on using and editing various field types, refer to the User Interface documentation. The definitions below are suggested meanings for the fields, but the fields can be leveraged differently to best meet your organization's needs. Administrators or users with developer-level role access have the ability to alter, add, or remove fields via Admin > Studio. For more information on configuring fields, please refer to the Studio documentation in the Administration Guide.
| Field | Description |
| Assigned To | The Sugar user assigned to the document. |
| Available Externally | Indication if a document should be made available outside of the CRM to external applications that integrate with Sugar. |
| Category | Primary category for locating documents. |
| Description | A description or other information about the document. |
| Document Name | The name or designation of the Document (Defaults to the filename of the Document). |
| Document Type | The type of the Document (e.g., NDA, Mail Merge, License Agreement, etc.). |
| Expiration Date | The date the Document expires. |
| File Name | Drag and drop a file or click "Browse" to navigate to the location to upload a Document. |
| Integration Sync ID | The sync key field used by external integrations to identify Sugar records in the external application. See the Integrate REST API endpoints in the Developer Guide for more details on how to use this field. |
| Is a Template | Classifies a Document as a template. Note: This is a legacy field that was previously used in conjunction with deprecated functionality. |
| Last Revision Create Date | The date the last revision related to the document record was created. |
| Publish Date | The date the Document is published (Defaults to today). |
| Related Document | A Document record that is related to this document. |
| Related Document Revision | The related document's current revision. |
| Revision | The most recent revision number for the document. Note: The Revision field becomes read-only after the initial save. |
| Source | Where the Document is stored (i.e, Sugar, Google, IBM SmartCloud, etc.). |
| Status | The current status of the document (e.g., Active, Draft, Expired, etc.). |
| Sub Category | Secondary category for locating documents. |
| Tags | User-created keywords that can be used to identify records in filters, dashlets, and reports. Note: For more information on creating and using tags, please refer to the Tags documentation. |
| Teams | The Sugar team(s) assigned to the document record. |
Documents and Google Drive
Sugar comes with Google Docs (Google Drive) integration by default. In order to be able to create a document in Sugar from a Google doc in your Google Drive you will first need to link your Google account with your user profile in Sugar. For more information on setting up external accounts in your user profile, please refer to the Getting Started documentation.
Creating via Google Drive
Users have the ability to create a Sugar document linked to a document stored in their Google Drive or Google Docs. In addition, you can upload documents from your local computer to these external sources (e.g., Google Drive).
Use the following steps to create a Sugar document linked to a document stored in Google Drive via the Documents module:
- Click the three-dots menu in the Documents module tab to open the actions menu and select "Create Document".
- Select "Google Drive" in the Source field, and the External Source option will appear below the File Name field's Browse button.
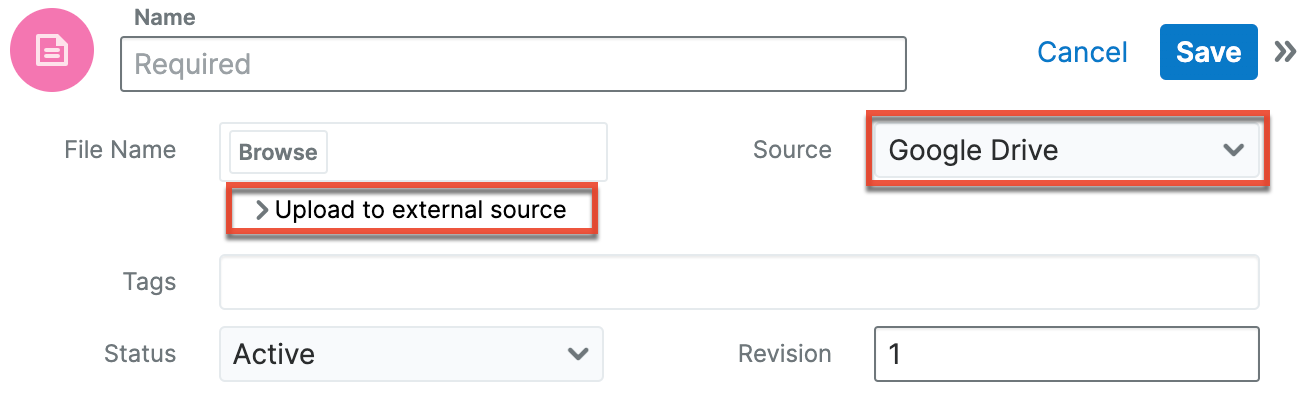
Note: If Google Docs is not an option in the Source dropdown, then you most likely need to connect your Sugar account to your Google Id through your user profile. For more information on how to connect to your Google Id in Sugar, please refer to the Getting Started documentation - To upload documents to Google Drive, click the Browse button in the File Name field to select a file from your local computer. For more information on supported file types, please refer to this Google Drive help article on the Google Help website.
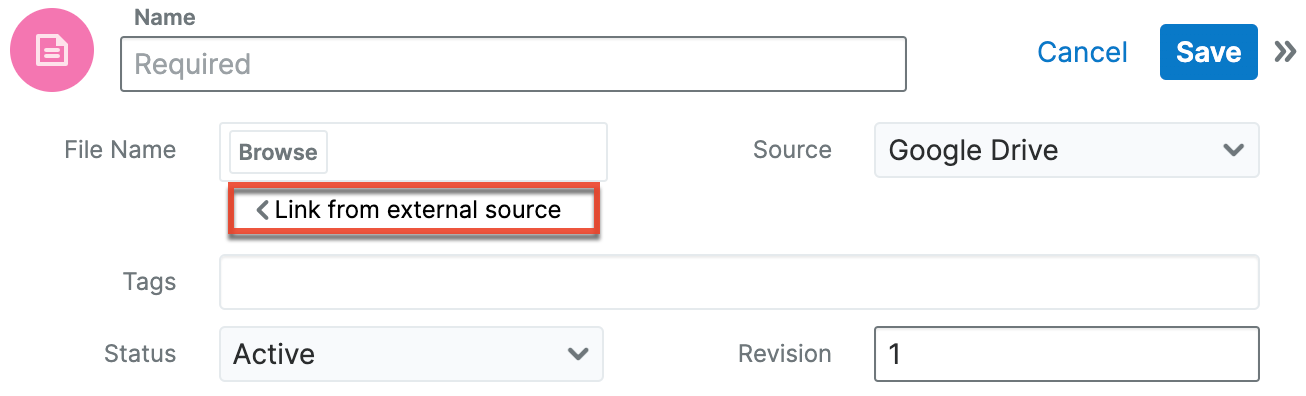
- Alternatively, you can link Google Drive documents to the Documents module by toggling the "Upload to external source" option to reveal the "Link from external source" option.
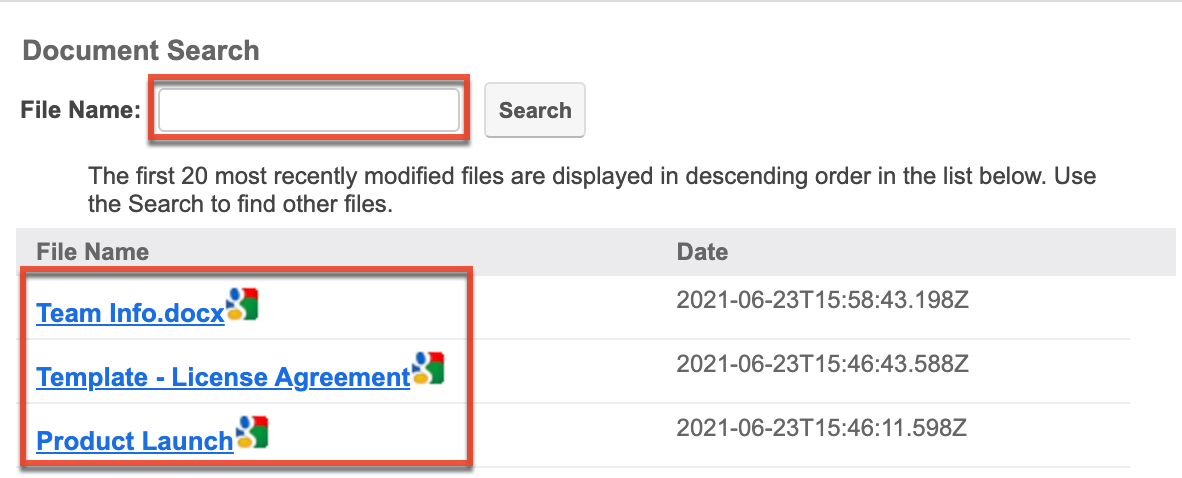
- Click the Browse button in the File Name field, and a pop-up window will appear showing the 20 most recently modified documents in your Google Drive.
Note: This will only show documents owned by you in your Google Drive, and will show documents from all folders in your drive. - Use the Search box to locate a specific document then select the document by clicking on the document's file name.
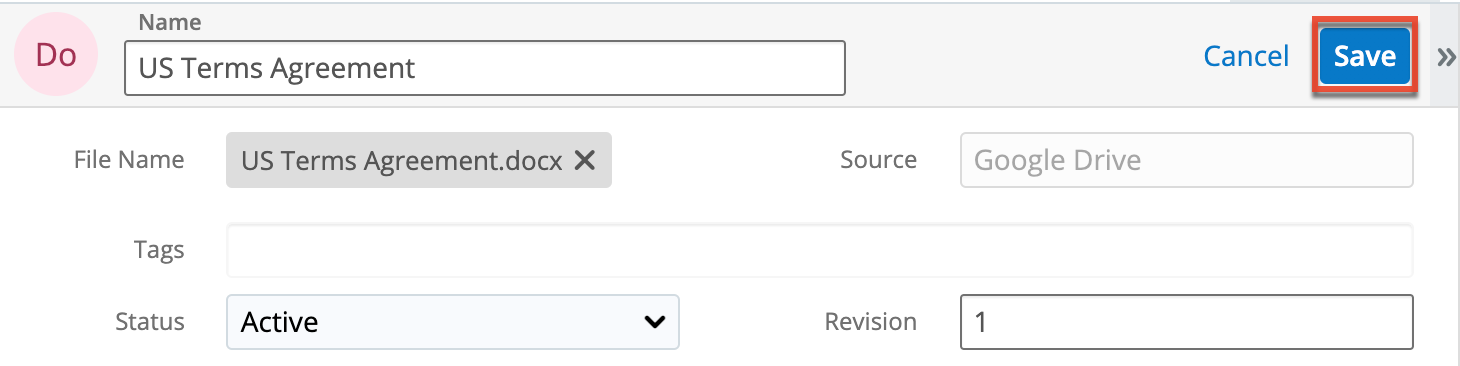
- Enter appropriate values for the remaining fields in the record view layout. All required fields are marked with a red asterisk and must be completed prior to saving.
- Once the necessary information is entered, click "Save".
Note: Documents that link to an external account (e.g., Google Docs, IBM Smart Cloud) cannot be used as attachments in emails composed through the Sugar Email Client.
Documents and Cloud Drive Integration
The Cloud Drive dashlet enables you to convert a document in a cloud drive (Dropbox, Google Drive, or Microsoft OneDrive) to a Sugar document in a couple of clicks. In the Cloud Drive dashlet, click the arrow next to the document that you want to convert, and select "Create Sugar Document". The document will be created as a new document record in the Documents module.
Document Revisions
Users can easily revise documents in Sugar by creating revision records via the Document Revisions subpanel. The subpanel lists all the document revisions for the parent document record and sorts the records in descending order by the revision number by default. Each revision retains a copy of the uploaded document in that revision, which allows users to easily look back at the history of the document to compare revisions. Please note that this does not work as expected with external documents (e.g., Google Docs, IBM Smart Cloud) as these documents are not stored in Sugar, and only a link to the document exists. To retain the change history, either utilize Google Doc's change features or select a different document for every revision.
To create a revision of the document you are currently viewing, simply click the Create button on the Document Revisions subpanel. The document revision record's name will be automatically populated with the parent document's name. The Revision field will also be automatically populated with the latest revision number plus one, but the value can be modified. If you skip numbers in the Revision field, Sugar will not go back and fill in the missing numbers when additional revisions are created. Please note that the Revision field will become read-only once the document revision record is saved. You can upload a new file for the document, and enter a short description of the change being made for the revision in the Change Log field. Once you have entered the necessary information, click "Save" to preserve your changes.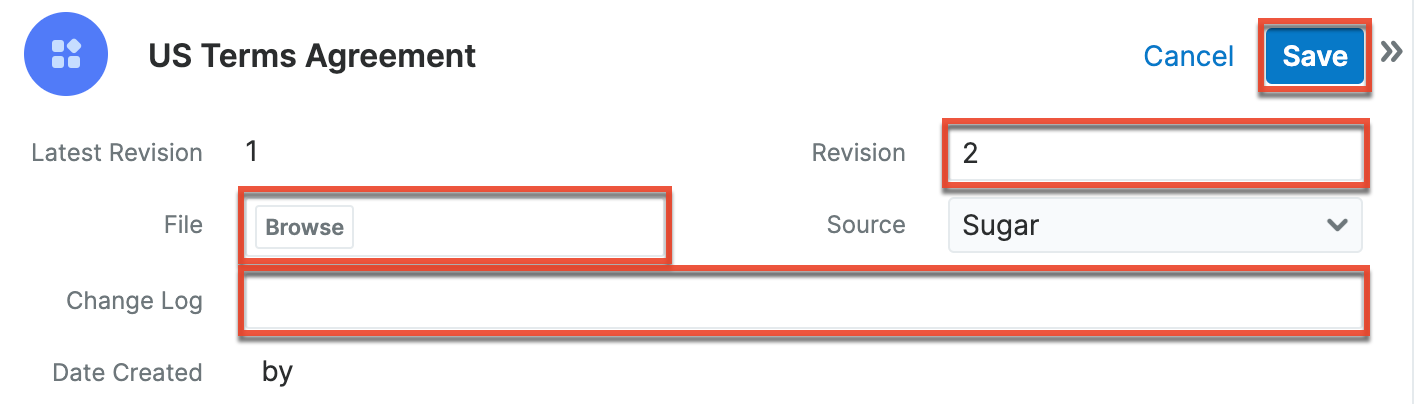
Note: When the parent document record is deleted in Sugar, all document revisions related to that document will be deleted as well.
Downloading Documents
Exporting a document from Sugar will only export the document record with the metadata about the document, but the document itself will not be included in the export. In order to download a document from the Documents module, simply click on the File Name link in the list view or the record view and the document will be downloaded to your computer. If the document is linked to an external source (e.g., Google Docs, IBM Smart Cloud), then the file name link will open directly to the doc via a new window or browser tab.
From Documents list view: 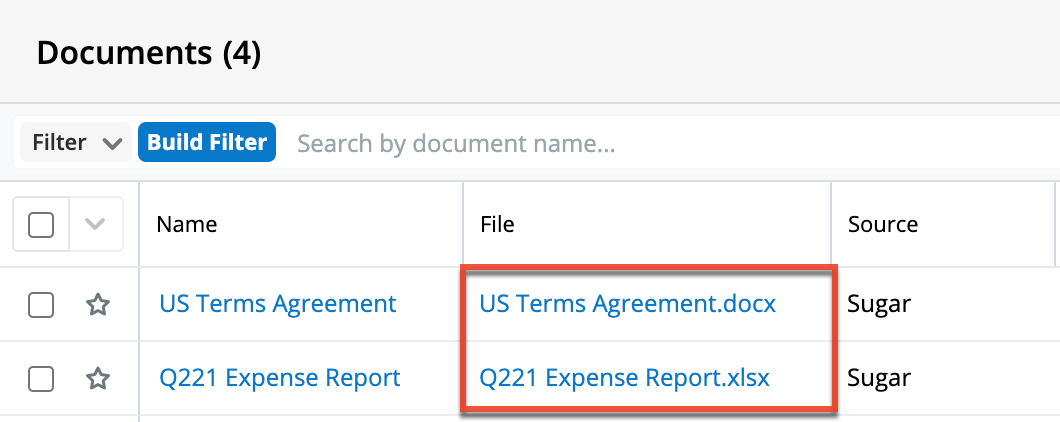
From Documents record view: 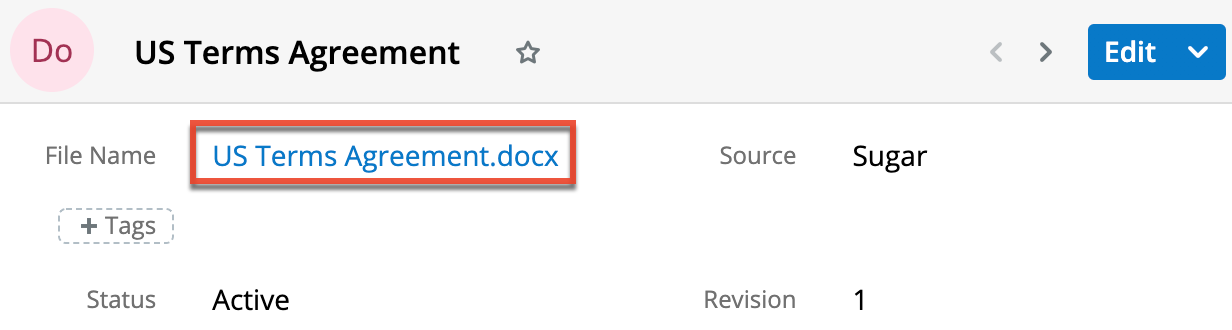
Working With Sugar Modules
While the Documents module has some features that only apply to documents, it also uses the Sidecar user interface that most Sugar modules are based on. The following sections detail menus, views, and actions common to Sidecar modules and contain links to additional information within the page or links to the User Interface documentation.
Document Menus
The Documents module contains various options and functionality that are available via menus in the module tab, list view, and record view. The following sections present each menu and its options with links to more information about each option in the User Interface documentation or, for Documents-specific functionality, within this page.
Module Tab Menus
Click the Documents module tab in the navigation bar to access the Documents list view. You may also click the three-dots menu in the Documents module tab to display the Actions, Recently Viewed, and Favorites menus. The Actions menu allows you to perform important operations within the module. The Recently Viewed menu displays the list of documents you most recently viewed. The Favorites menu displays the list of documents you most recently marked as favorites.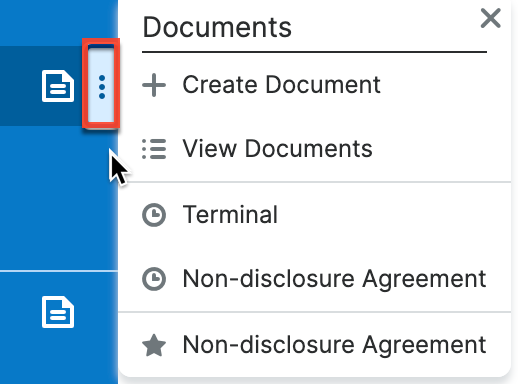
The module tab's Actions menu allows you to perform the following operations:
| Menu Item | Description |
| Create Document | Opens the record view layout to create a new document. |
| View Documents | Opens the list view layout to search and display documents. |
For more information on module tab menus including reasons a module may not be included in the menu, see the User Interface documentation.
List View Menus
The Documents list view displays all document records and allows for searching and filtering to locate specific documents. You can view the basic details of each record within the field columns of the list view or click a document's name to open the record view. To access a module's list view, simply click the module's tab in the navigation bar.
List View Mass Actions Menu
The Mass Actions menu to the right of the checkbox option in the list header allows you to perform mass actions on all currently selected records. You can use the checkbox on each record's row to select individual document records or click the checkbox in the list header to select all records displayed on the current set of list view results.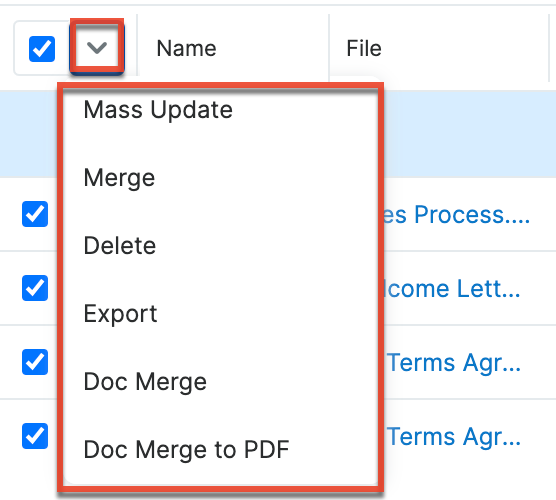
The Mass Actions menu allows you to perform the following operations:
| Menu Item | Description |
| Mass Update | Mass update one or more documents at a time. |
| Merge | Merge two or more duplicate documents. |
| Delete | Delete one or more documents at a time. Note: All document revisions related to the parent document record will be deleted when the document is deleted. |
| Export | Export one or more documents to a CSV file. |
| Recalculate Values | Visible only if the module contains fields using Sugar Logic and only to System Administrators or users with Developer-level role access, this option will refresh the selected records' calculated values. |
| Doc Merge | Select or create a DOCX template to merge record data into documents that will be accessible in the Doc Merge widget. |
| Doc Merge to PDF | Select or create a DOCX, XLSX, or PPTX template to merge record data into PDF documents that will be accessible in the Doc Merge widget. |
List View Record Actions Menu
The Record Actions menu to the far right of each record's row allows you to perform actions on the individual document directly from the list view.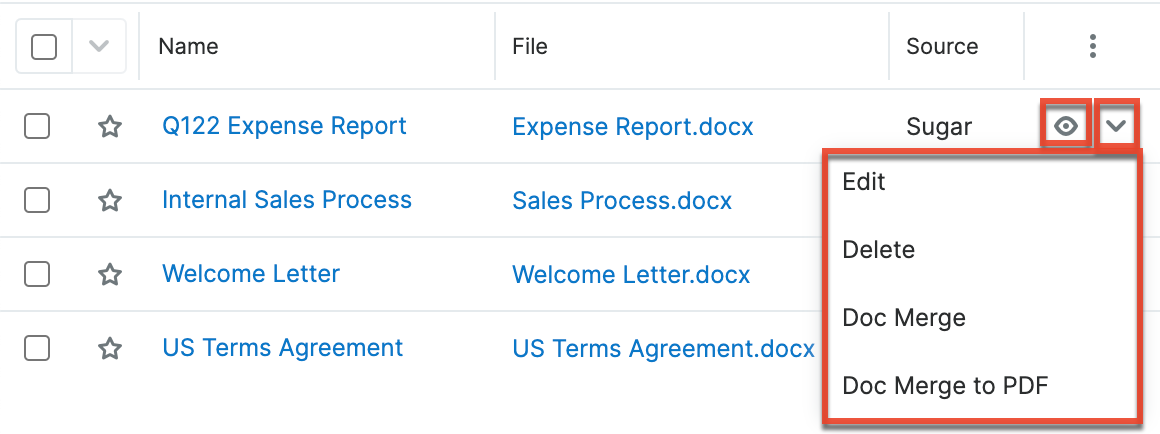
The list view's Record Actions menu allows you to perform the following operations:
| Menu Item | Description |
| Preview (Eye icon) | Preview this document in the intelligence pane. |
| Edit | Edit this document. |
| Delete | Delete this document. Note: All document revisions related to the parent document record will be deleted when the document is deleted. |
| Doc Merge | Select or create a DOCX, XLSX, or PPTX template to merge record data into documents that will be accessible in the Doc Merge widget. |
| Doc Merge to PDF | Select or create a DOCX, XLSX, or PPTX template to merge record data into PDF documents that will be accessible in the Doc Merge widget. |
Record View Actions Menu
The Documents record view displays a single document in full detail including its fields and subpanels of related records. To access a document's record view, simply click a hyperlinked document name from anywhere within Sugar. The record view's Actions menu appears on the top right of the page and allows you to perform various operations on the current record.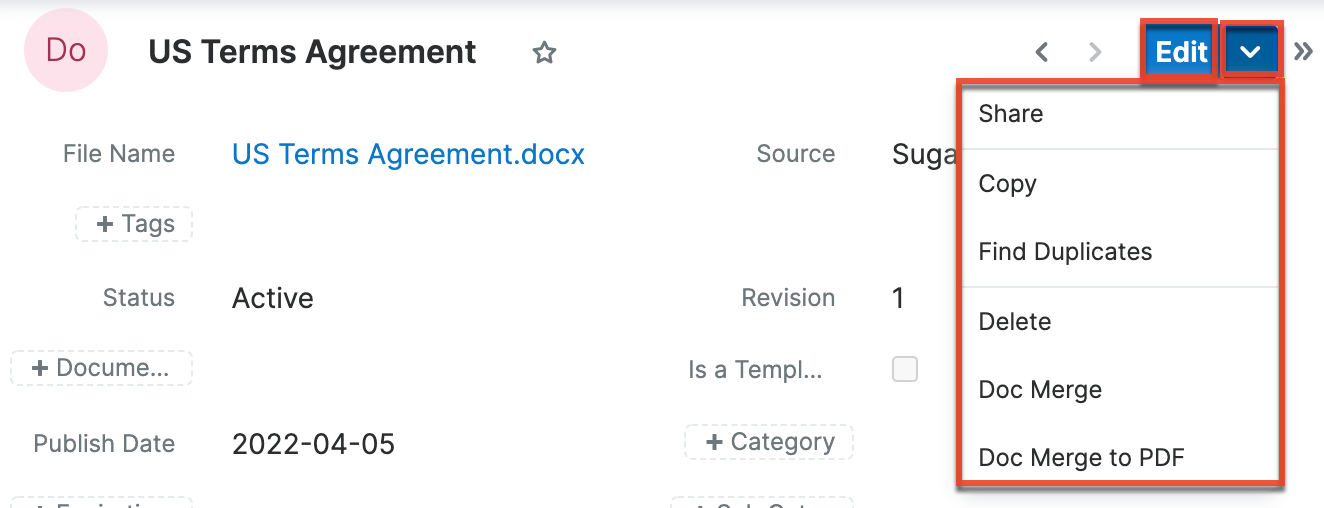
The Actions menu allows you to perform the following operations:
| Menu Item | Description |
| Edit | Edit this document. |
| Share | Share a link to this document via email. |
| Copy | Duplicate this document. Note: Only the last document revision record related to the original document will copy over to the new document, and the "Change Log" will display "Document Created". |
| Find Duplicates | Locate potential duplicates of this document. |
| Delete | Delete this document. Note: All document revisions related to the current document will be deleted when the document record is deleted. |
| Doc Merge | Select or create a DOCX, XLSX, or PPTX template to merge record data into documents that will be accessible in the Doc Merge widget. |
| Doc Merge to PDF | Select or create a DOCX, XLSX, or PPTX template to merge record data into PDF documents that will be accessible in the Doc Merge widget. |
Documents Subpanel
The Documents subpanel displays Sugar documents that are related to the current record. You can sync these records to the Cloud Drive dashlet or send them to DocuSign.
You can sync either all records in the subpanel or specific records to your cloud drive. Note that you must have the corresponding Cloud Drive dashlet present on the record view to use these options. You can click the Actions menu in the top right corner of the dashlet and choose "Sync All To Dropbox", "Sync All To Google Drive", or "Sync All To OneDrive" to sync all documents in the subpanel to the corresponding system. You can also select the Actions menu to the right of a specific Sugar document and select "Sync To Dropbox", "Sync To Google Drive", or "Sync To OneDrive" to sync only that record. Records are always synced to the folder that is currently displayed in the corresponding dashlet and the sync is a one-time action.
Using the integration to DocuSign, you can send documents from the Documents subpanel to DocuSign by clicking the Actions menu to the right of a specific Sugar document and selecting "Send to DocuSign".
Common Views and Actions
In the table below, the left column contains links to the User Interface page covering topics that are applicable to all Sidecar modules. The right column has links to sections of the current page that cover topics specific to documents.
| General Instructions for Working With Sugar Modules | Documents-Specific Instructions |
| Use the links below to navigate to the User Interface page that covers topics generic to many Sugar modules. | When Documents-specific help exists for each topic, use the links below to navigate to sections of the current page. |
| Creating Records | Creating via Google Docs |
| Viewing Records | |
| Searching for Records | |
| List View | List View Mass Actions Menu List View Record Actions Menu |
| Tile View | |
| Record View | Record View Actions Menu |
| Intelligence Pane | |
| Editing Records | |
| Deleting Records | |
| Exporting Records | |
| Recalculating Calculated Values | |
| Finding Duplicate Records | |
| Merging Records | |
| Favoriting Records | |
| Following Records | |
| Sharing Records |