Creating Forms
Overview
Forms are a key part of your marketing toolbox, letting you capture information on new leads and existing contacts. Sugar Market forms can be placed on Sugar Market pages and external pages. This page will guide you through the form creation process.
Creating a Form
Use the following steps to create a form via the Pages and Forms module:
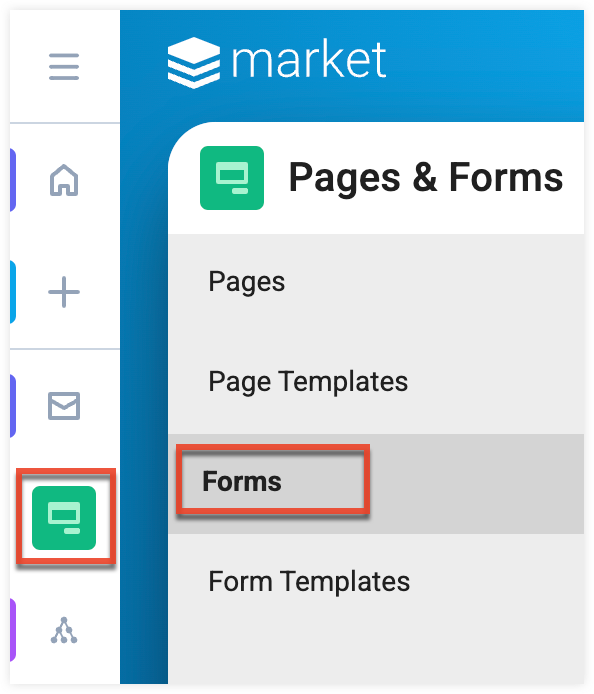
- In the navigation bar, click the Pages and Forms module.
- From the submodule options, click "Forms".
- From the Forms list view, click the Create button in the toolbar, then select "Form" in the dropdown menu.
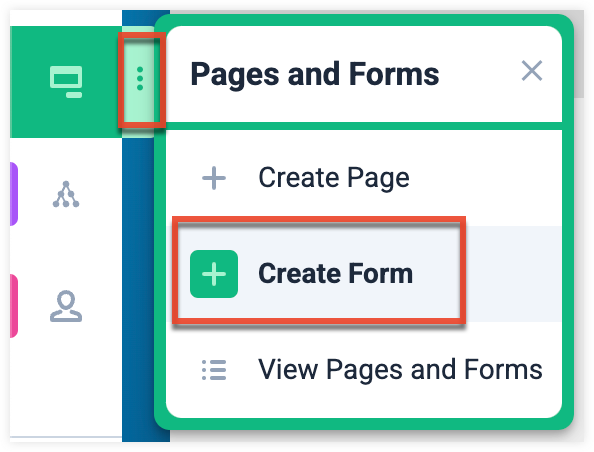
You can also quickly create a form via the navigation bar by clicking the three-dots menu displayed when hovering over the Pages and Forms module.
Working with Form Builder
After creating your form, the form builder will open and guide you through configure the settings and design of your form. Form builder provides an easy-to-use interface, helping you quickly create and publish your forms.
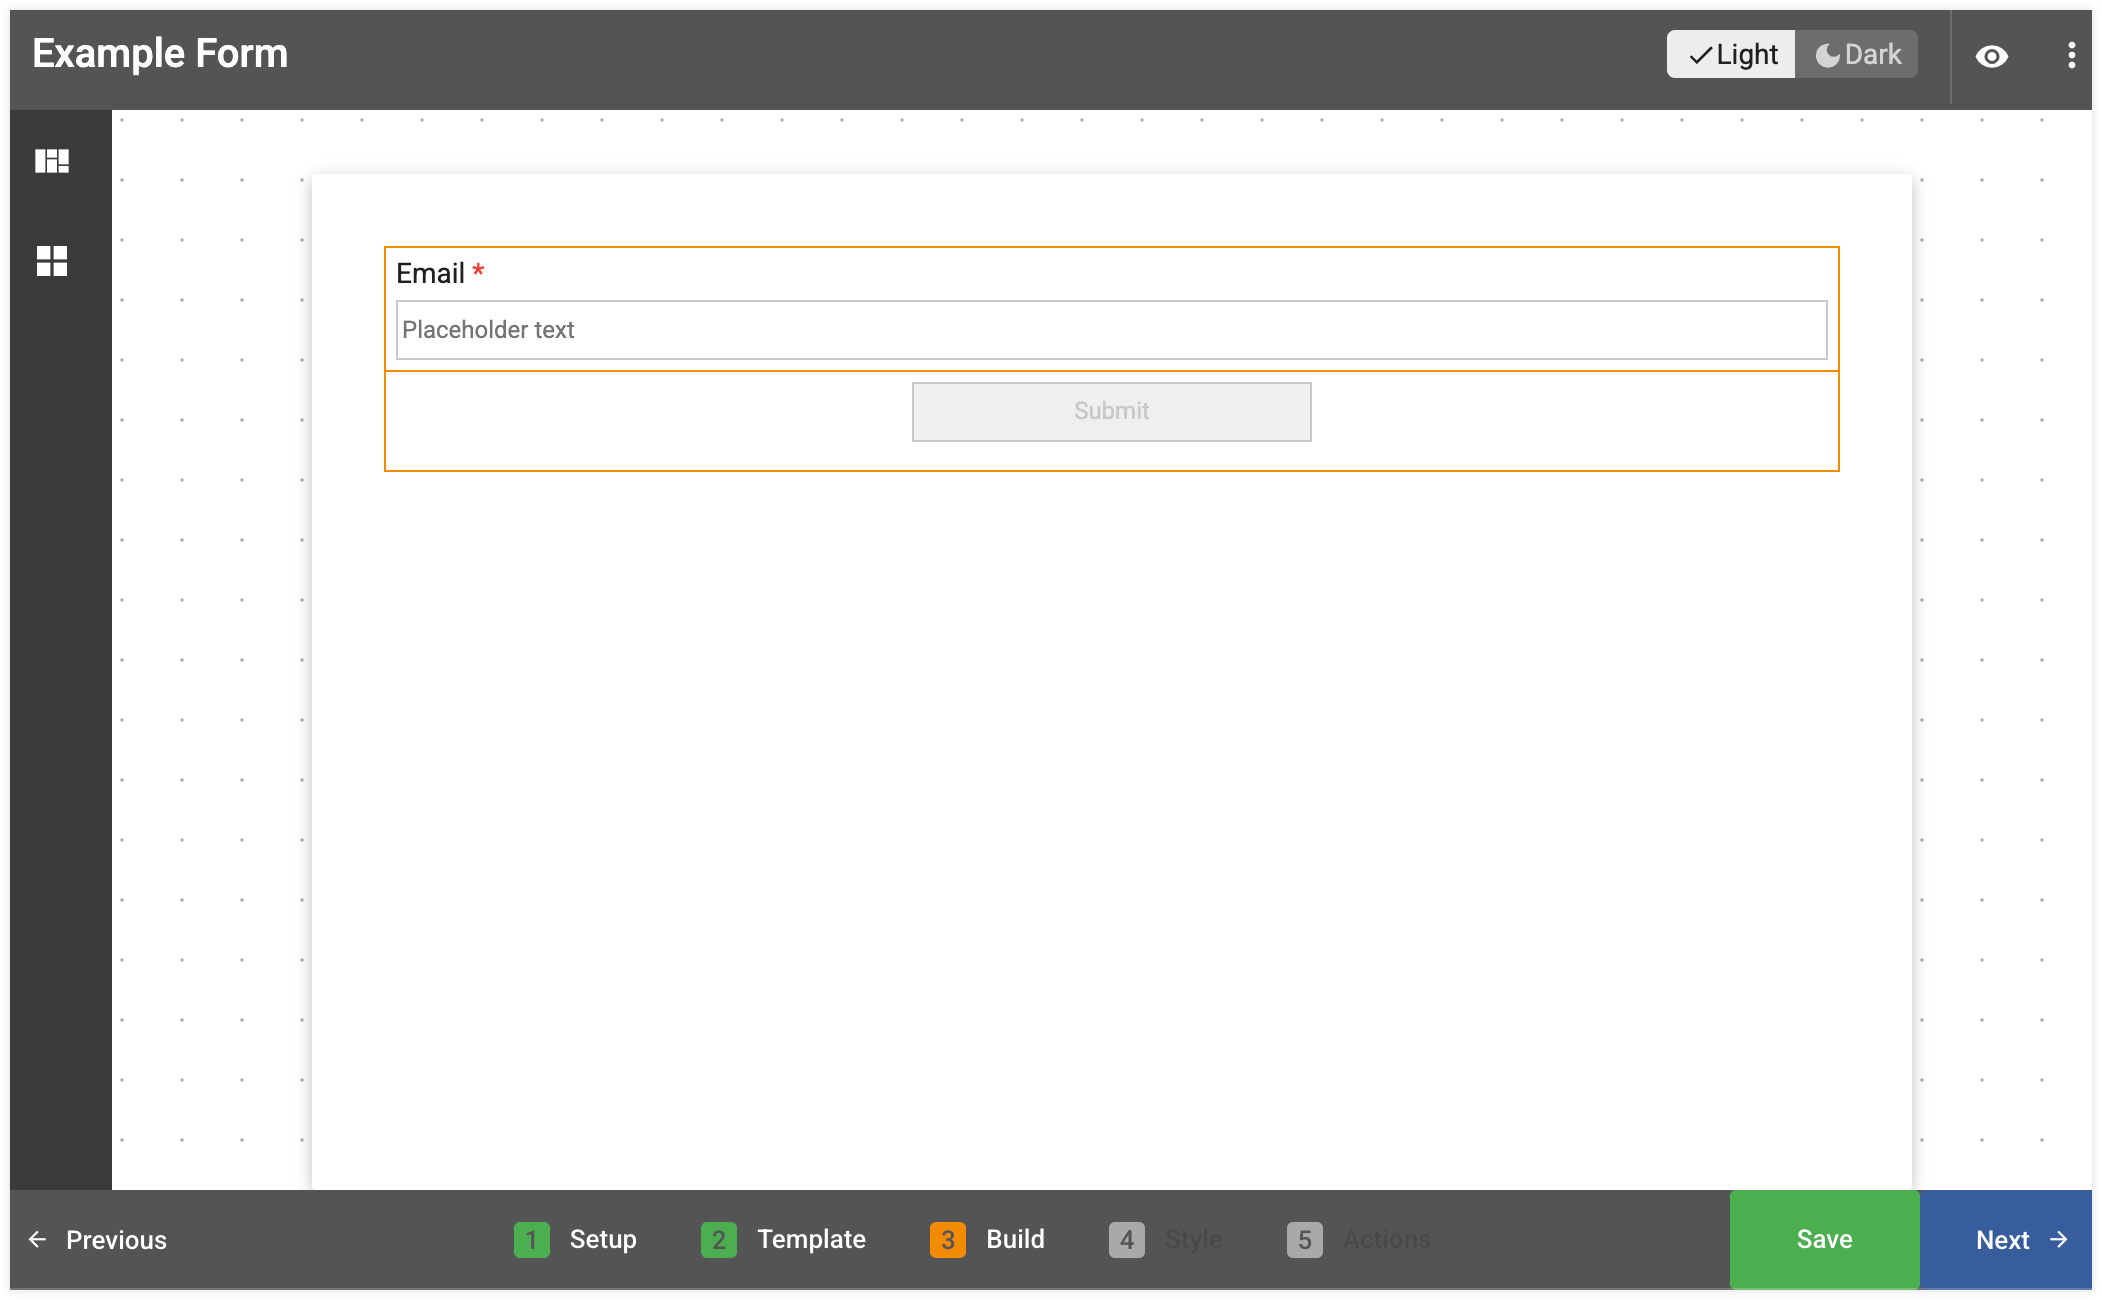
Toolbar
At the top of the builder is a toolbar, giving you quick access to frequently used options. The options available in the toolbar will vary based on the step you are on.

| Icon | Name | Description |
| Light/Dark Toggle | Toggle the canvas background of your form preview between dark and light modes. Available in Preview and in the Template, Build, and Style steps. | |
| Context Menu |
Opens a dropdown containing multiple options. Available in the Build, Style, and Actions steps.
|
|
| Preview |
Preview how your form will appear on desktop and mobile displays. Available in the Build, Style, and Actions steps. The preview may not accurately reflect how your form will appear on an external page. |
|
| Desktop View | Preview how your form will appear on a desktop display. Available in Preview. | |
| Mobile View | Preview how your form will appear on a mobile display. Available in Preview. |
Builder Steps
The builder is divided into a series of steps, visible at the bottom of the builder, that guide you through the design process. Once you have completed the required actions of a step you can move to the next step by clicking the Next button. You can return to a previous step by clicking the step name or by clicking the Previous button. Any changes you make in the builder are automatically saved; you can click the Save button at the bottom of the page to manually save your progress when you are on the Setup, Template, Build, and Style steps. When on the Actions step, the Publish button will allow to publish your completed form.

Each step in the builder focuses on a specific area of the form creation process.
Setup Step
In the Setup step, you will set up the basic details and settings of your form.
| Name | Description |
| Name | The internal name used to identify the form in Sugar Market. |
| Folder | The folder where the form is saved in Sugar Market. |
| Type |
The type of the form. This field is primarily used for organizational purposes, but some types can control what form fields are available in the Build step. You must select the Event or Email Preferences form types to connect your form to event sessions or include email preferences form fields, respectively. |
| Select Event |
The event associated with the form. This field is only visible if you set the form type to "Event". |
| Description | An internal description of the form. |
| Enable URL Parameters |
Check this option to add UTM parameters that help you track the source of a form submission. |
| Enable Double Opt-In |
Check this option to get consent from your customers to receive email communications. New leads who submit a form with double opt-in enabled will automatically receive a pre-defined email asking for their consent to receive email communications from you. You can also configure double opt-in in Global Settings to be enabled by default. |
For reference, the language users will see in the opt-in email can be found below:
Hi
{Recipient Name}
You are receiving this email to confirm your subscription to receive marketing communications from{Company Name}such as marketing emails, product update emails, calls, etc. If you'd like to confirm your subscription, please click on the button below.[Yes, Confirm My Subscription]
Template Step
In the Template step, you will select the template you want to use in the Build step. You can select a pre-built template which are stock templates built by Sugar Market or a custom template which are forms you have created and saved as a template. When you select a template a preview will be displayed.
Build Step
In the Build step, you will select the fields and blocks used to build your form and configure their settings, mappings, and layout.
Fields and Blocks (click to expand)
| Name | Description |
| Single Line Text | This field collects text input displayed in a single line. This field is best used for short form open ended inputs. You can set a limit to the amount of characters a form submitter can input into this field. |
| Multi Line Text | This field collects text input displayed across multiple lines. This field is best used for long form open ended inputs. You can set a limit to the amount of characters a form submitter can input into this field. |
| This field collects inputs in a valid email address format and is a required field by default. This field cannot be removed from your form and must be mapped to the stock Sugar Market Email field in order to sync form submissions to an external CRM, send confirmation emails, send form alerts, and create form submissions rules. | |
| Phone Number | This field collects number and text input and can display placeholder text of the standard US number format or the standard international number format. Additionally, this field can have formatting enforced, ensuring a uniform phone number is entered. |
| Radio | This field collects a single selected option from the options displayed. |
| Checkbox | This field collects multiple selected options from the options displayed. |
| Dropdown | This field collects a single selected option from the dropdown of options displayed once the field is clicked. |
| Slider | This field collects a number value selected by a slider's position on a scale. The max value the number can reach and the interval of each increment of the slide movement can be adjusted. |
| Number | This field collects a number input that can either be inputed by typing a number or set by clicking the up and down buttons visible when hovering over the field. You can set a limit to the max number a form submitter can input into this field. |
| Switch | This field collects a single selected option from the displayed toggle switch. |
| Time/Date | This field collects either the date formatted as MM/DD/YYYY or the date and time as formatted as MM/DD/YYYY HH:MM AM/PM. |
| Rating | This field collects a number value based on the number of stars selected. The amount of stars displayed can be adjusted. |
| Hidden Field | This field is not displayed on the published form and is used to capture hidden values when the form is submitted. |
| Email Preferences | This field lets leads and contacts manage their email subscription types. |
| ReCaptcha | This field requires a ReCaptcha check before the form can be submitted. |
| Unsubscribe | This field lets leads and contacts unsubscribe from all email subscription types. |
Adding and Removing Fields and Blocks
To add or remove fields or blocks:
- Click either the field or block icon from the bar on the right side of the builder.
- Click and drag the field or block type into the builder canvas.
- Once a field or block is added it can be dragged and dropped to adjust its location.
- To remove a field or block, select it and then from the field options click the trashcan icon.
Configuring Field Settings
The settings of most fields can be configured. To configure a field:
- On the Build step, select the field.
- From the field options, click the gear icon.
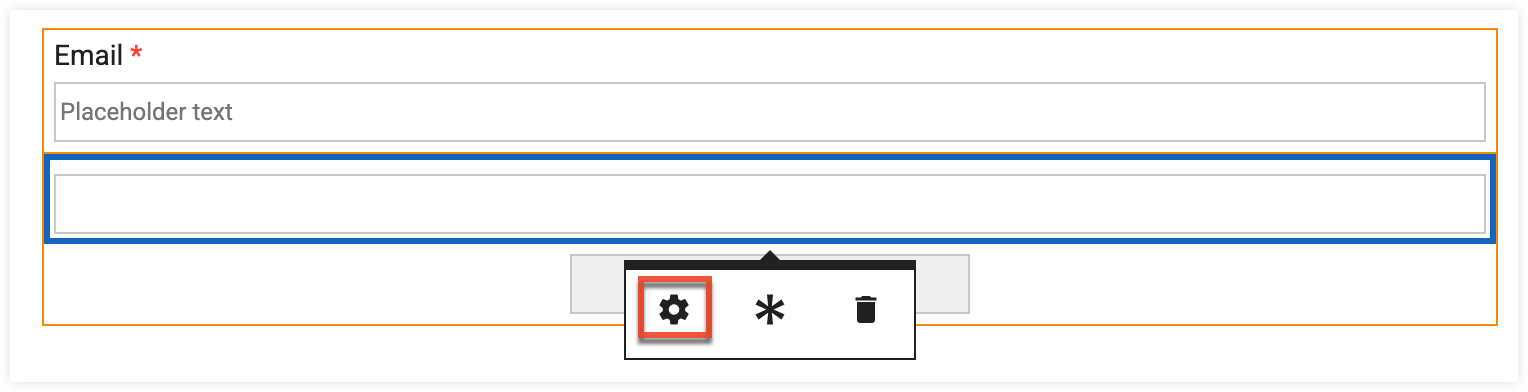
- Configure the field's settings as needed from the Field Mapping & Setting window.
Conditionally Displaying Fields
Conditional form fields and field options can be dynamically displayed based on a contact's answer to another dropdown field on your form. This feature lets you create a more tailored experience and helps you collect only relevant data from leads and contacts. Only dropdown fields can be used to trigger conditional fields. Email fields, Hidden fields, Dropdown fields that are triggering conditional fields, and structural elements cannot be set as conditional fields. Please note that if a field has conditions associated with it, the field cannot be removed until those conditions are removed first.
Configuring Conditional Fields and Field Options (click to expand)
Adding Conditional Fields
Follow these steps to configure conditional fields on your form:
- Add a dropdown field to your form. This field will be used to trigger conditional fields.
- Add your conditional fields. These fields will be displayed or not displayed based on the value selected in your dropdown trigger field.
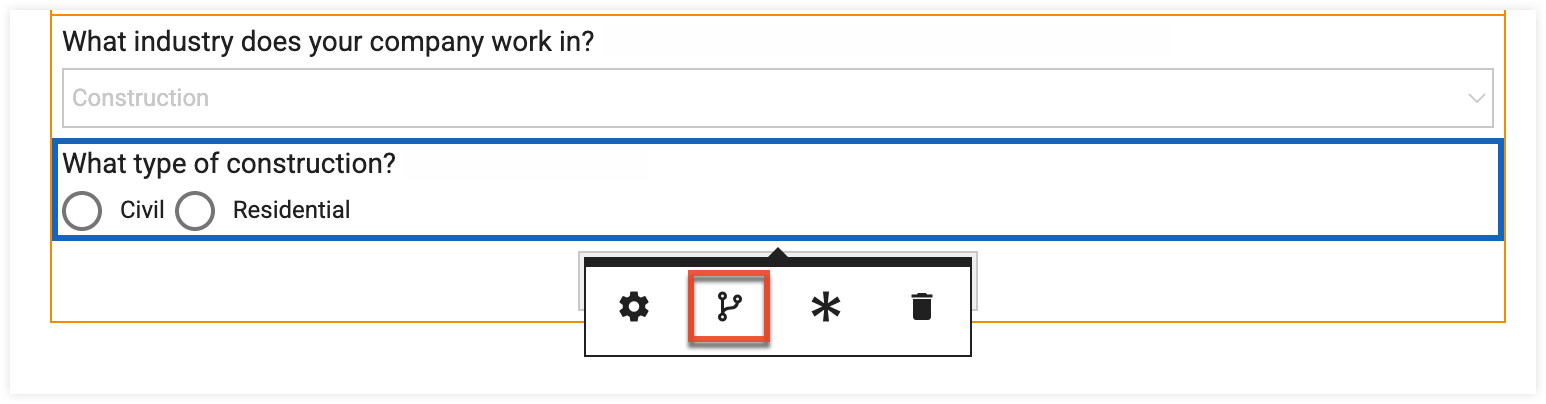
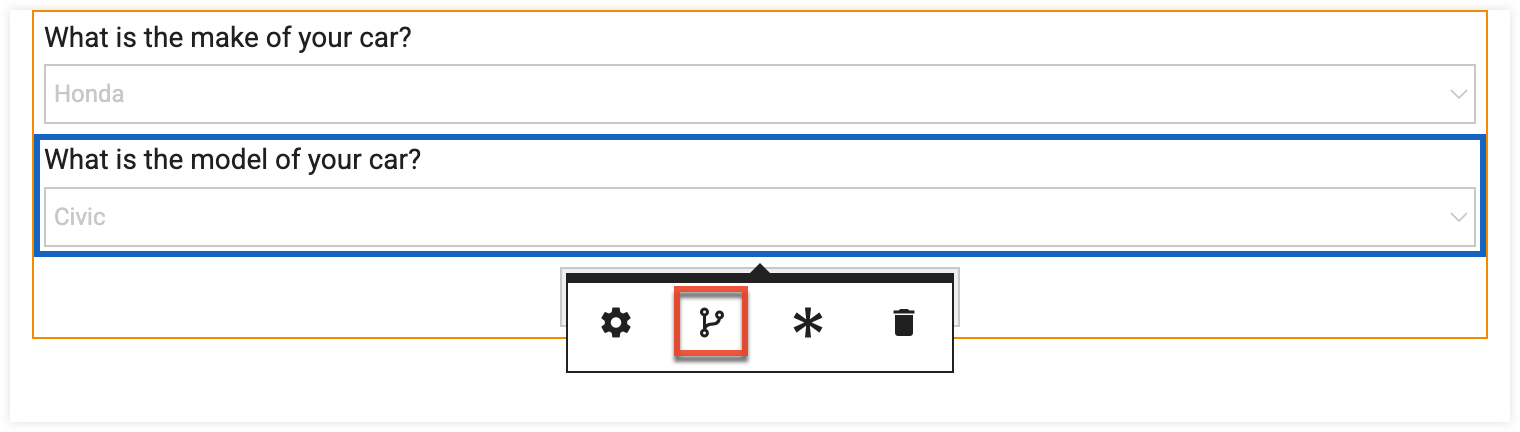
- Once your conditional fields are added, configure their conditional display settings by selecting the field and then click the conditional logic icon.
- From the Conditional Display Settings, select "Conditionally Display This Field".
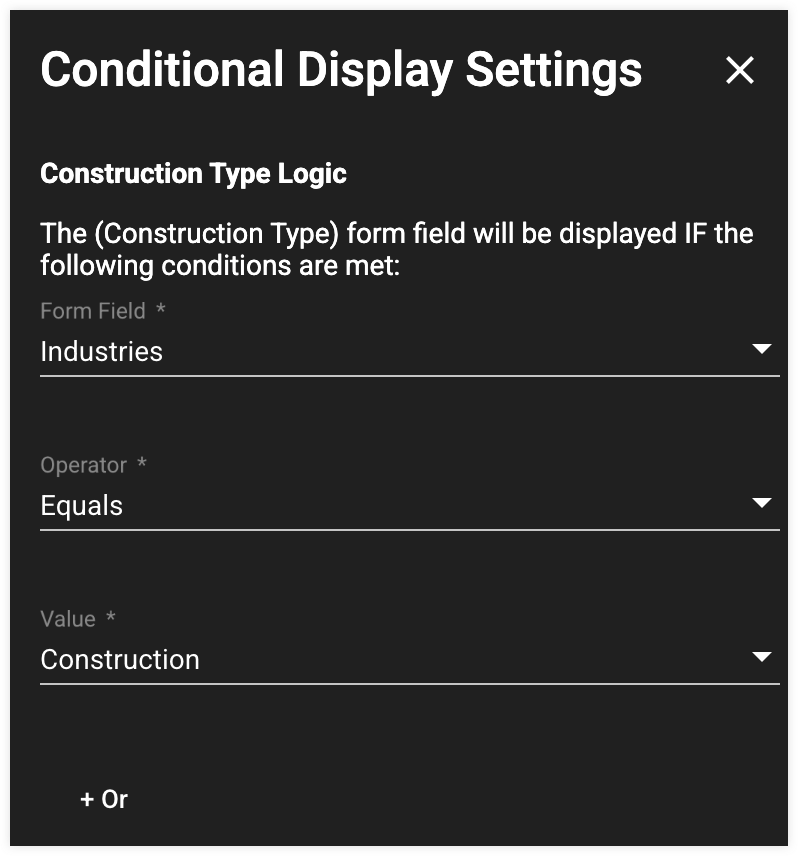
- In the "Form Field", select the dropdown field you want to use to trigger the conditional field. Dropdown fields are listed by their "Field Name".
- In the "Operator", select the operator that needs to be met for the selected dropdown field value.
- Using "Value", select the specific dropdown field value you want to use in tandem with the operator to trigger the conditional field. In the screenshot below, this conditional field has been configured to only display when the Industries dropdown field is set to "Construction".
- If needed, you can add additional OR conditions by clicking the + Or button.
- Once conditional logic is applied to a field it will be bordered in a grey dashed line.
- To preview how the conditional field will behave once your form is published, open the Preview view and set the dependent dropdown field to the value that will trigger the conditional field.
Adding Conditional Field Values
Follow these steps to configure conditional field values on your form. Only dropdown, radio, and checkbox fields can be set as conditional fields when configuring conditional field values.
- Add a dropdown field to your form. This field will trigger conditional field values.
- Add your conditional fields. These field's values will be conditionally displayed based on the value selected in your trigger field.
- Once your conditional fields are added, configure their conditional display settings by selecting the field and then click the conditional logic icon.
- From the Conditional Display Settings, select "Conditionally Display This Field's Options".
- In the "Form Field", select the dropdown field you want to use to trigger the conditional field options. Dropdown fields are listed by their "Field Name".
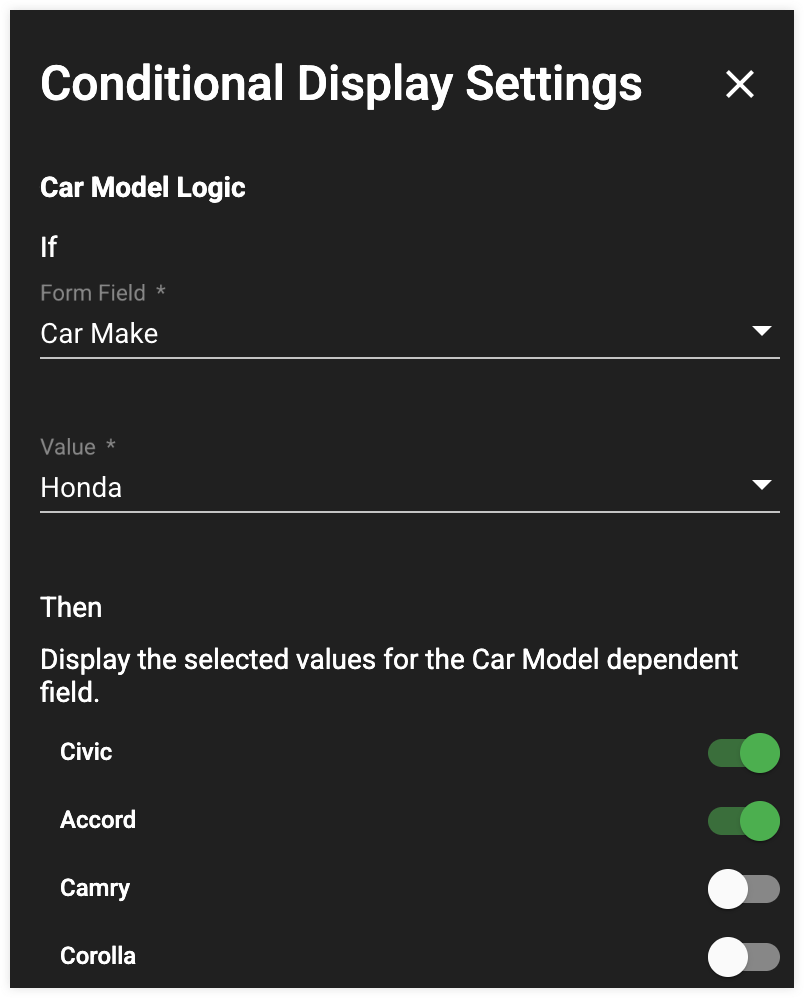
- In the "Value", select the dropdown field value that you want to use to set the conditional field options.
- Then toggle on the conditional field options you want to be displayed when the dependent field value is selected. In the screenshot below, this conditional field will only display the Civic and Accord field options when the Car Make dropdown field is set to "Honda".
- Use the Value field to set the conditional field values you want to appear for any other of the dependent field's values. If any dependent values have no conditional field values set to be displayed the conditional field will be hidden if that dependent value is selected.
- Once conditional logic is applied to a field it will be bordered in a grey dashed line.
- To preview how the conditional field options will behave once your form is published, open the Preview view and set the dependent dropdown field to the value that will trigger the conditional field options.
Controlling How Form Submission Data is Collected and Stored
Most form fields can map the collected value from a form submission to a Sugar Market CRM Lead or Contact field. To enable mapping for a field:
- On the Build step, select the field and from the field options, click the gear icon.
- From the Field Mapping & Setting window, switch on the Map to Field toggle.
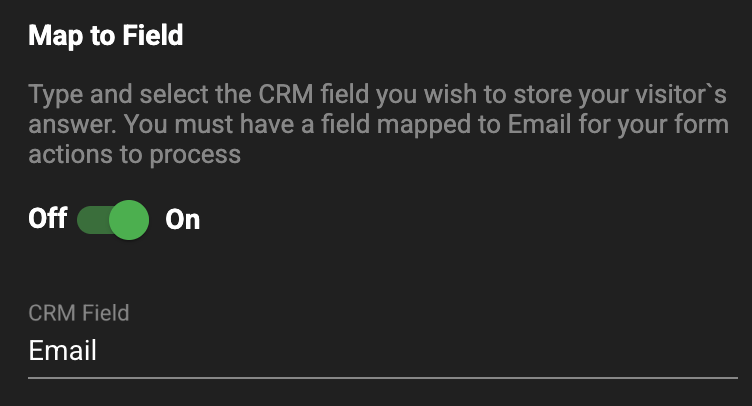
- Click the CRM Field that appears below and search for the CRM field you want to map the form field to.
- By default, the values collected from a mapped field will overwrite any existing values. If needed, you can disable this by switching the Overwrite Data toggle off. Please note that when this option is enabled, fields cannot be overwritten with blank (i.e., null) values.
Style Step
In the Style step, you can configure the styling of most elements visible on the form. To configure the styling for a form element:
- Select the element in the canvas.
- From the Style window make the desired changes using the options available.

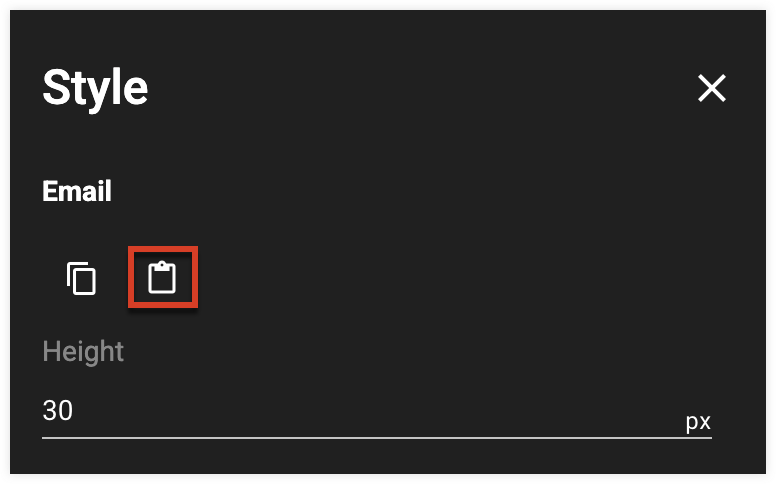
Copying Styles
After configuring the style of a form field, you can copy the style configuration and paste it to other fields on your form. To copy the style configuration of a field:
- Select the field in the canvas.
- From the Style window click the copy icon.
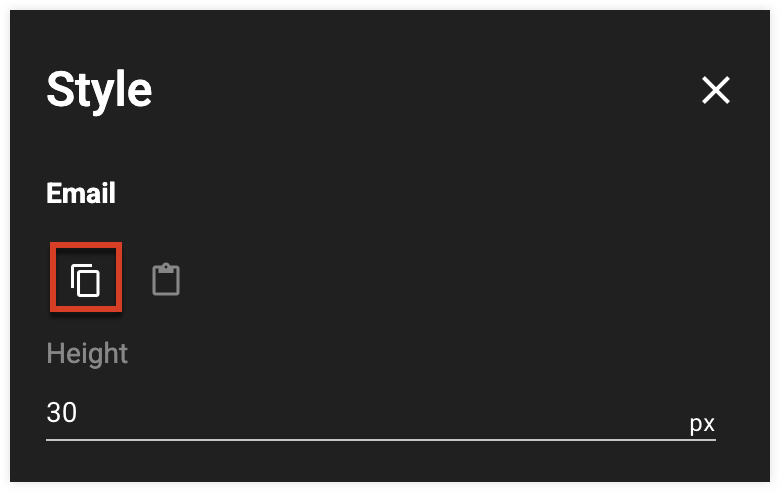
- Select the field you want to copy the style to and from the Style window click the paste icon.
Actions Step
In the Actions step, you will publish your form and configure what happens after the form receives a submission.
| Name | Description |
| Redirect URL | The URL the lead or contact will be sent to after submitting the form. A redirect URL must be set before you can access the rest of the Actions step settings and publish your form. |
| CRM Sync | Turning this toggle on will sync form submissions to your external CRM. |
| Confirmation Email | Select a Trigger email template to be sent to the lead or contact after they have submitted the form. Please note that changes to an email template are not automatically reflected in form actions. To update the template, the form action needs to be reconfigured and the template reselected. |
| Form Alert | Send an email to a specific user notifying them of form submissions. The alert email can be sent with each submission or on a daily and weekly basis. |
| Field Submission Rules | Trigger specific actions once specific conditions are met based on the information submitted by a lead or contact. |
Configuring Field Submission Rules
After a form is submitted, field submission rules can trigger specific actions once specific conditions are met based on the information submitted by a lead or contact.
A field submission rule includes both the conditions that must be met and the actions to occur if those conditions are met. If a rule has multiple conditions, those conditions are evaluated using AND logic; all of the conditions must be met for the actions to be triggered. To create a field submission rule:
- In the Field Submission Rules section, click the Add Rule button to create a condition.
- In the "Form Field", select the field that will trigger the action.
- In the "Select an operator" and "Field Value", select the conditions the field must meet for the action to be triggered.
- Click the Create button.
- Once created, conditions appear as a grey card in the Field Submission Rule section.
- In the same row as the condition you created, click the blue "Click to add an action" card to configure what action will be triggered.
- Using the Select an Action field, select an action.
Note: You must select "Add To Nurture 2" or "Remove From Nurture 2" to select non-legacy nurtures. - Once an action is selected, the Select Option field will dynamically change based on the selected option. For example, if you selected "Send Email" as the action you would then select the trigger email template that would be sent.
- Click the Create button.
- To add additional conditions or actions to the field submission rule, click the + icon and then select either "Add Condition" or "Add Action".
Reordering Field Submission Rules
If your form contains multiple rules, they will be checked against a form submission in descending order. Once a rule meets the set conditions to be triggered no other rules will be triggered. You can re-order rules by dragging and dropping them.
Triggering a Field Submission Rule for Every Submission
To configure a rule to trigger for every form submission, set the following condition: if the Email form field contains @.
Publishing
Review your form to ensure that you have added all of the necessary fields, then click the Publish button to publish your form. Please note that published fields cannot be deleted from a form. Once your form is published it can then be added to a Sugar Market page or an external page using the provided HTML code. Changes made to a published form are automatically synced to any pages with the form. If your form was created before the Sugar Market 25.4.0 release, you must republish the form and the Sugar Market page or update the external page’s HTML code to establish the sync.
Restricting Form Submissions
You can use a suppression list to prevent visitors using specific email addresses or domains from submitting forms on your landing pages. For more information on creating suppression lists, refer to the Suppression Lists page.
You can follow these steps to enable a suppression list to restrict form submissions on your landing pages:
- Create a new suppression list or edit an existing one.
- Select the domain level option if you wish to also suppress the email domain(s) listed in your suppression list.
- Apply the suppression list to your landing pages by selecting the Landing Pages option.

- Add the email addresses and domains you wish to prevent from submitting a form on your landing pages.
- Save your suppression list.
Managing Duplicate Form Submissions
By default, Sugar Market automatically deduplicates form submissions using the value mapped to the Lead and Contact Email field as the unique identifier. You can also deduplicate form submissions using both the mapped Email value and Company value as unique identifiers by enabling the Enable Account Name Deduplication option in your Global Settings and adding a required field mapped to Company to your form.
Deduplication Flow With Account Name Deduplication Disabled
- The email address of the submission is checked against all existing lead and contact records.
- If no matching email address is found, a new lead record is created.
- If a matching email address is found, the existing record is updated.
- If multiple matches are found, the existing record that was most recently modified is updated.
Deduplication Flow With Account Name Deduplication Enabled
- The email address of the submission is checked against all existing lead and contact records.
- If no matching email address is found, a new lead record is created.
- If a matching email address is found, the existing record is updated.
- If multiple matches are found, the account name of the submission is then checked against all existing lead and contact records.
- If no matching account name is found, a new lead record and associated account record is created.
- If a matching account name is found, the existing associated record is updated. If there are multiple associated records the record that was most recently modified is updated.