Asset Library
Overview
The Asset Library is accessible by users with permissions via the Admin Navigation or Marketing Navigation role. The Asset Library contains all of the images and documents that have been uploaded to Sugar Market for use in various locations, including emails, landing pages, and user profile photos.
Working in the Asset Library
To access the Asset Library click the Asset Library module from the navigation bar.

Asset folders are displayed at the top of the page, and individual assets are displayed below.
Locating Assets
You can locate assets by typing the asset file name, or part of a name, in the search field at the top of the page. Sugar Market will only search the Assets that are not contained in folders; however, you can open a specific folder and then search within the folder.
Use the filter and sort options to show only specific file types and to order assets by name or date.
Viewing Assets
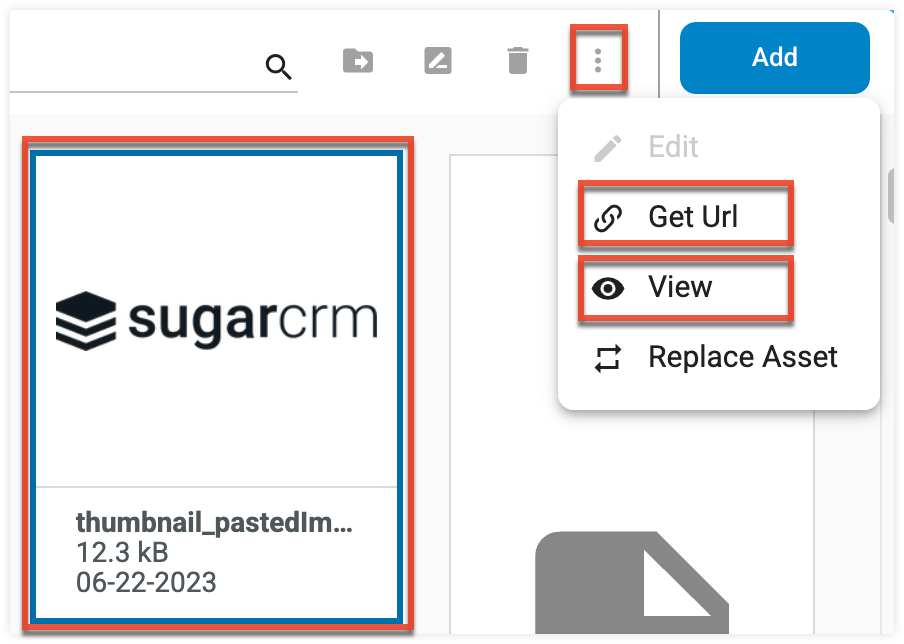
While the displayed thumbnail images can help you identify assets, you can view the full image by either double-clicking on the thumbnail, or by selecting "View" from the three-dots menu in the toolbar when the file is selected. To copy the image's URL to the system clipboard, select "Get Url" from the three-dots menu when the file is selected, and then click the Copy button.

Renaming Assets
While you cannot edit assets within the Asset Library, you can rename them.
- With the image selected, click the Rename icon in the toolbar.
- Type the new name in the Rename field, and then click the Rename button.

Deleting Assets
To permanently delete a file from the Asset Library, click the Delete icon in the toolbar with the asset selected, and then click the OK button in the confirmation dialog.

Important: Any emails using the asset will have the image removed.
Adding New Assets
You can add new files to the Asset Library for use in emails, landing pages, and general marketing documentation. Upload any of the following file types up to 50 MB:
- Images : jpg, jpeg, gif, png, bmp, tiff, tif, svg, webp
- Documents : docx, doc, xlsx, xls, ptt, pptx, pdf
- Audio : mp3
- Other : css, otf, tff, woff, woff2, eot, and eps
Tip: While static images are great for emails, you may also consider using other animated file types in emails, such as GIFs, that are generally supported in newer email clients.
To upload new files:
- Click the Add button at the top of the page, and then select Asset from the flyout menu.
- Select the desired file, and then click the Open button. The file is uploaded to the main collection in the Asset Library.
- To move the file to a folder, select the file and then click the Organize button in the toolbar.
- Select the desired folder, and then click the Move button.

Replacing an Existing Asset
You cannot edit files within the Asset Library, but you can replace an existing file by uploading a new file using the Replace Asset function. This allows you to replace an existing file in the Asset Library with another file of the same file type, and a redirect is automatically created from the original asset URL to the new asset URL. This allows you to make updates to a file in a single location and have those changes applied everywhere the asset is referenced in Sugar Market, ultimately saving you time.
To replace an asset:
- Select the asset you want to replace in the Asset Library.
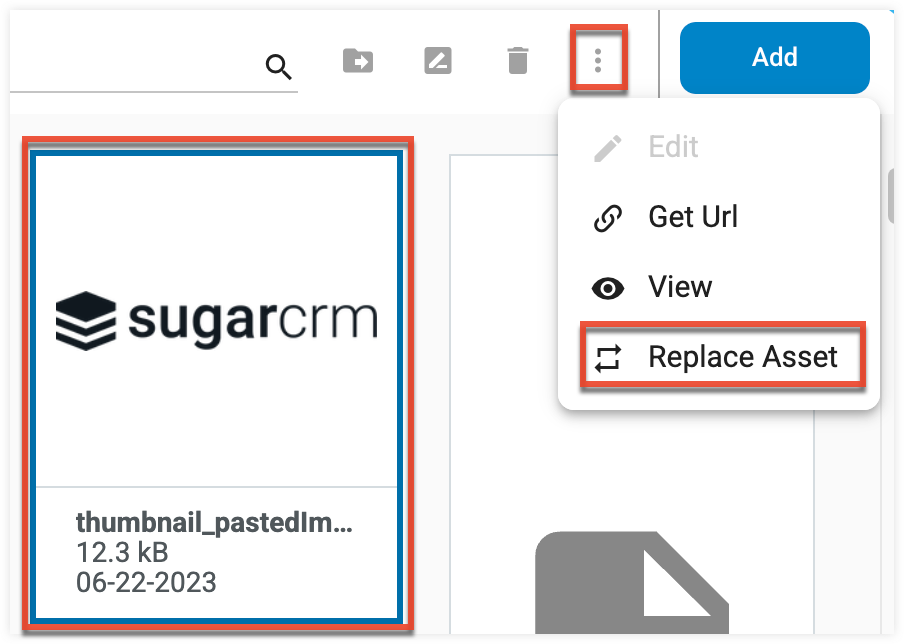
- Click the three-dots menu in the toolbar and select "Replace Asset".
- Select the file you want to upload, and then click the Open button. The file must have the same extension as the original file.

Managing Asset Folders
Folders can help you organize a large collection in your Asset Library. You may find it useful to group assets by business unit or by file type. The following functions are available for Asset Library folders.
Renaming Folders
- With the image selected, click the Rename icon in the toolbar.
- Type the new name in the Rename field, and then click the Rename button.
Deleting Folders
To permanently delete a folder from the Asset Library, you must first delete all assets contained in the folder. When empty, click the Delete icon in the toolbar while the folder is selected, and then click the OK button in the confirmation dialog.
Creating Folders
- Click the Add button at the top of the page, and then select "Folder" from the flyout menu.
- Type a name for the folder in the Name field, and then click the Create button.
Moving to Folders
You can move assets to specific folders from the main Asset Library collection, or from within another folder.
To move an asset, either drag the asset to the desired folder or:
- Select the file to move, and then click the Organize icon in the toolbar.
- Select a folder name and then click the Move button, or click the New Folder icon to create a new folder where the asset will be moved.